FAQ: the panel

You have just ordered a server at Portallis and want to configure, optimise or customise it? This panel FAQ is here to guide you step by step through the Portallis panel, so you can make the most of your game server.

Whether you are a beginner or an advanced user, you will find detailed answers to the most frequently asked questions about managing your server. From logging in to the panel to installing mods, through resource management and a full reinstall, this FAQ covers every essential aspect so you can manage your server with ease.

➡️ Check the General FAQ to learn more about managing your account, payments and subscription.
➡️ Head to the FAQ for your game for specific guides to Minecraft, FiveM, ARK, Rust and many more.

Panel guides, screen by screen

Step by step, with screenshots and troubleshooting.

How do I access my Portallis panel and log in?

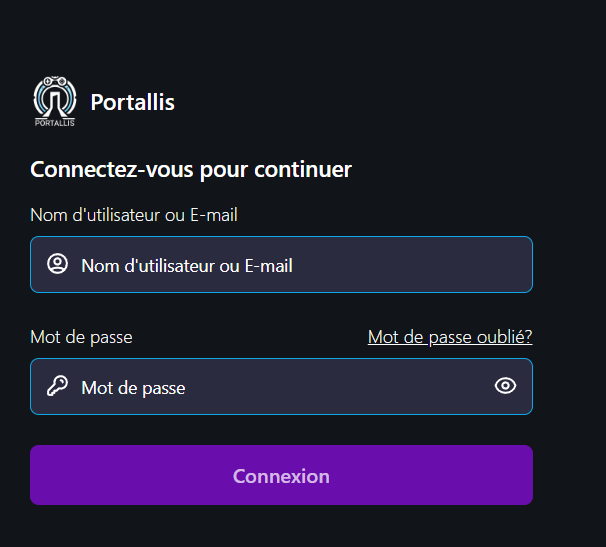
1. Open the panel website

2. Enter your login details

  • Enter the email and password you created when you signed up in the client area.
  • If you have lost your password, use the “Forgot password?” option to reset it.

3. Log in

  • Click “Login” to access your management area.

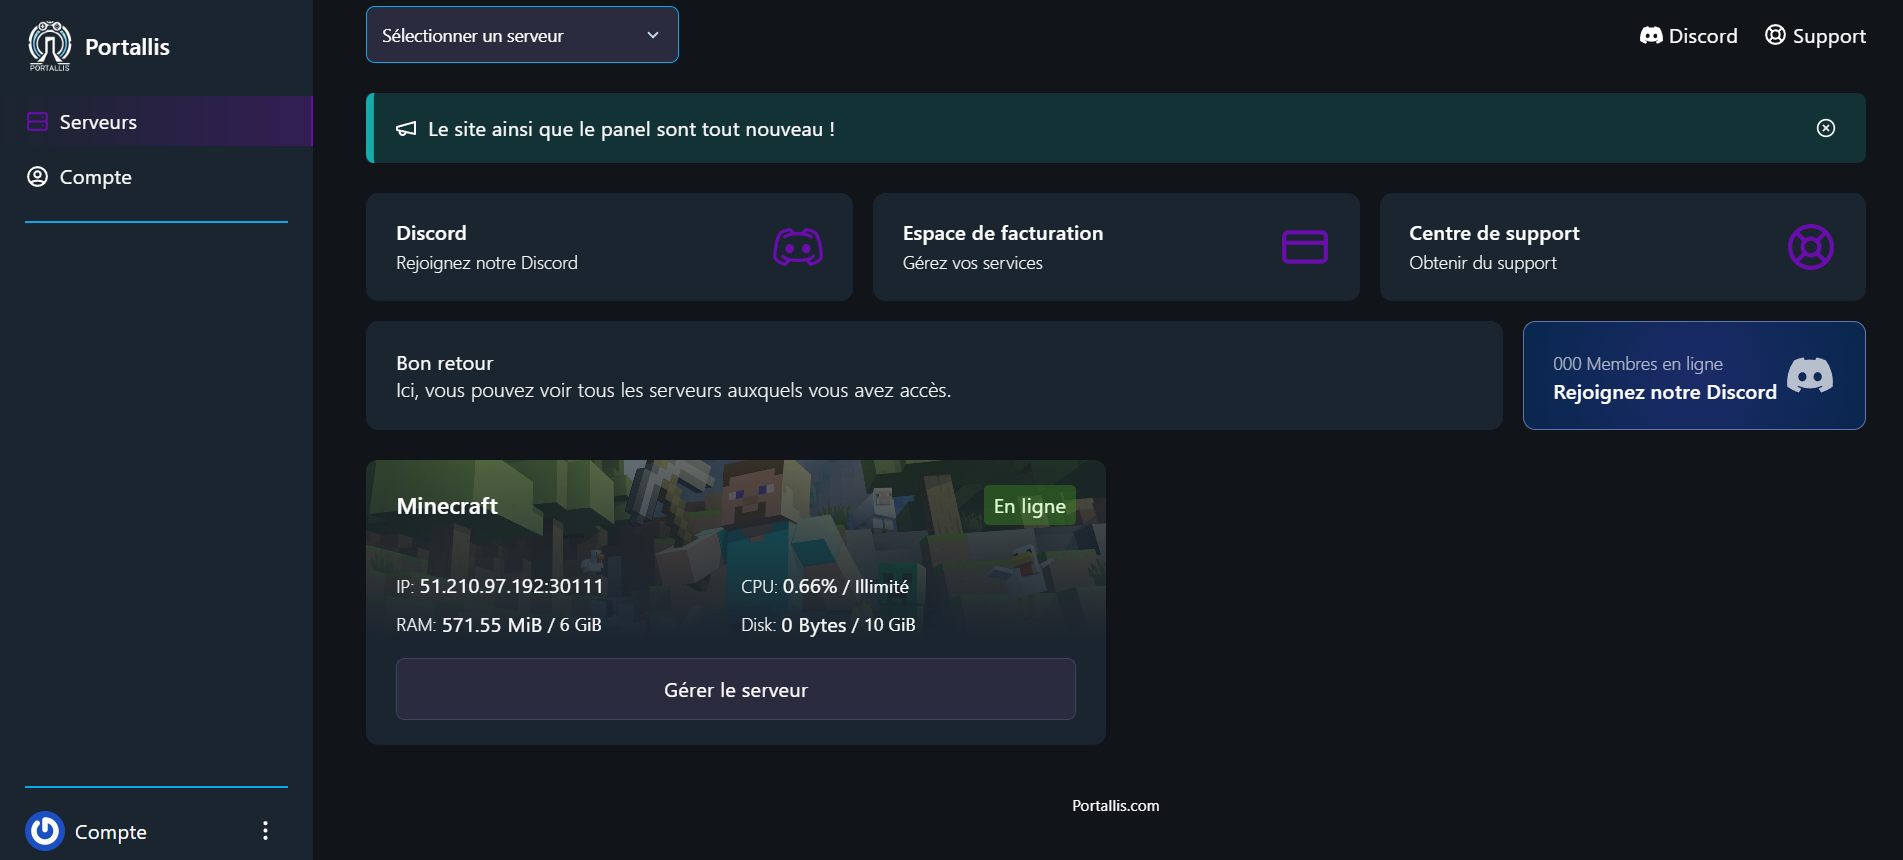
4. Check your information

  • Once logged in, check that your server is listed on your dashboard.
  • If you do not see any server, make sure your order has been processed.
1
2
4

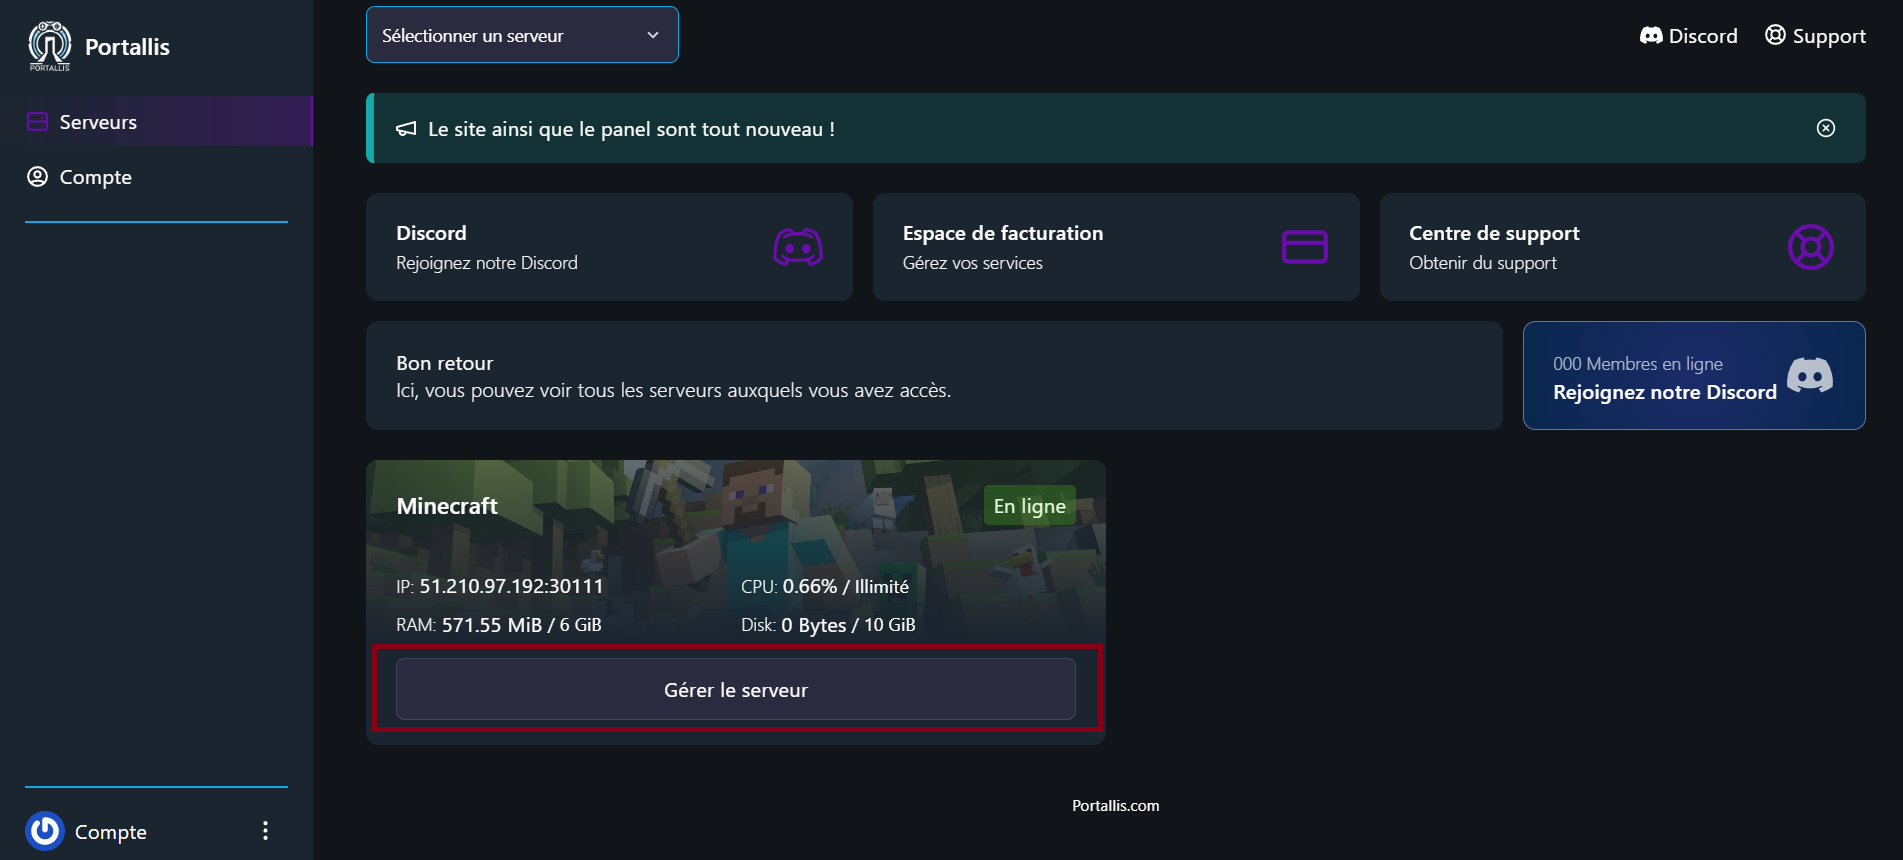
1. Open your server

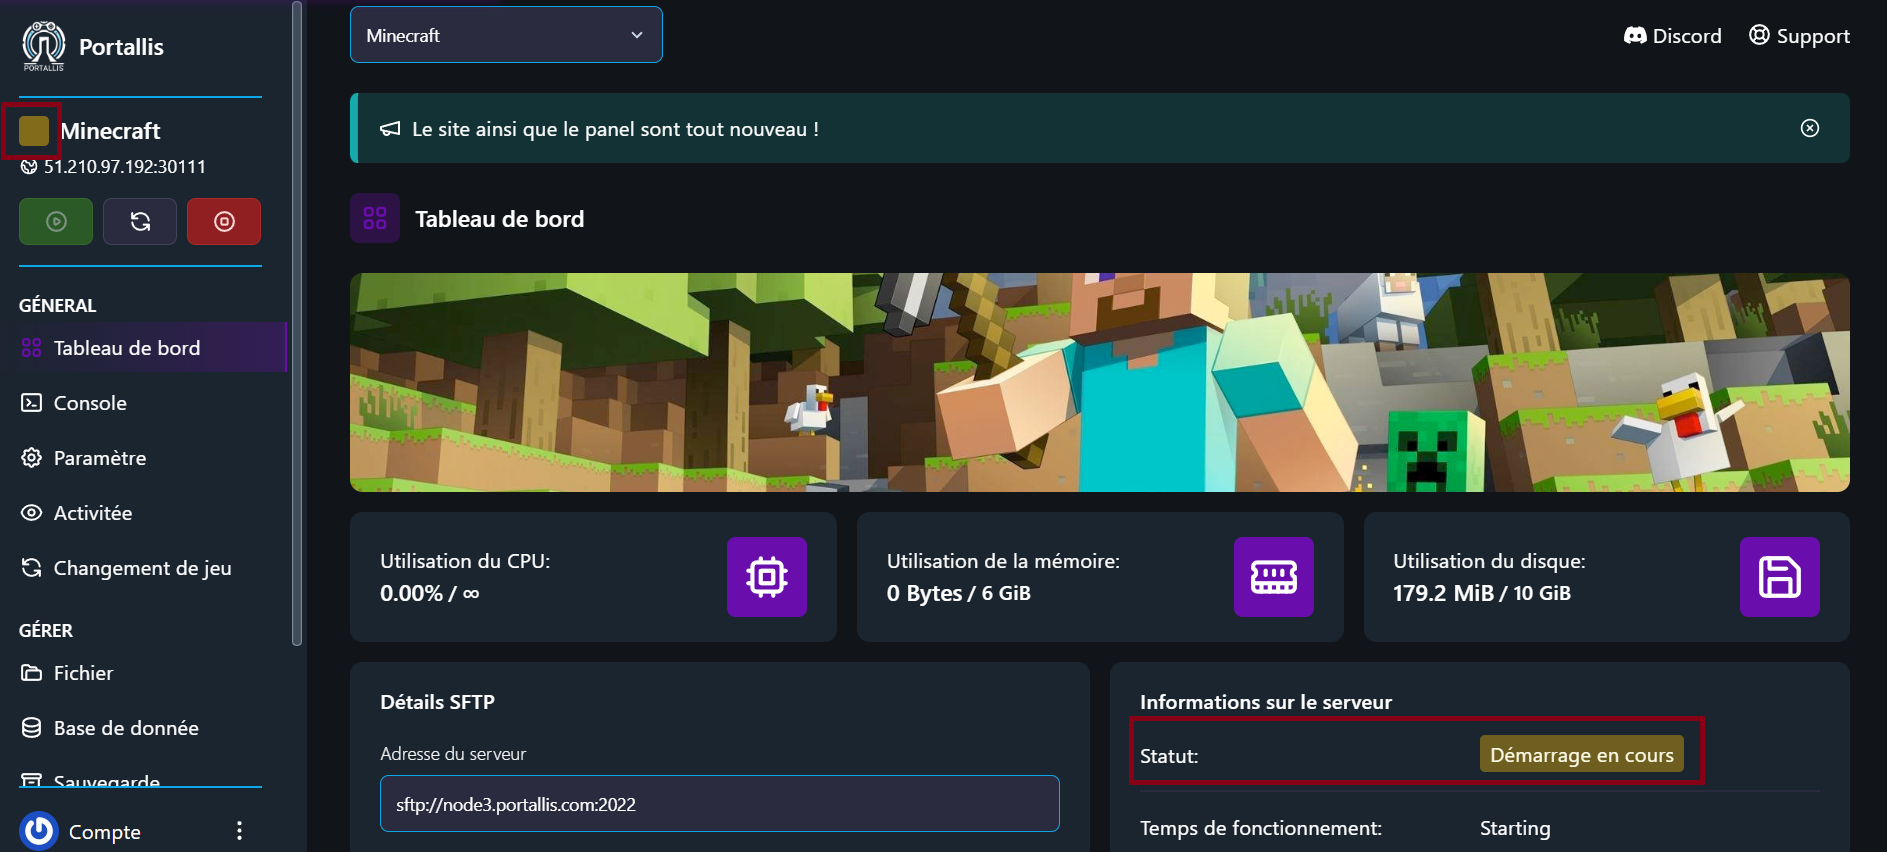
2. Use the control buttons

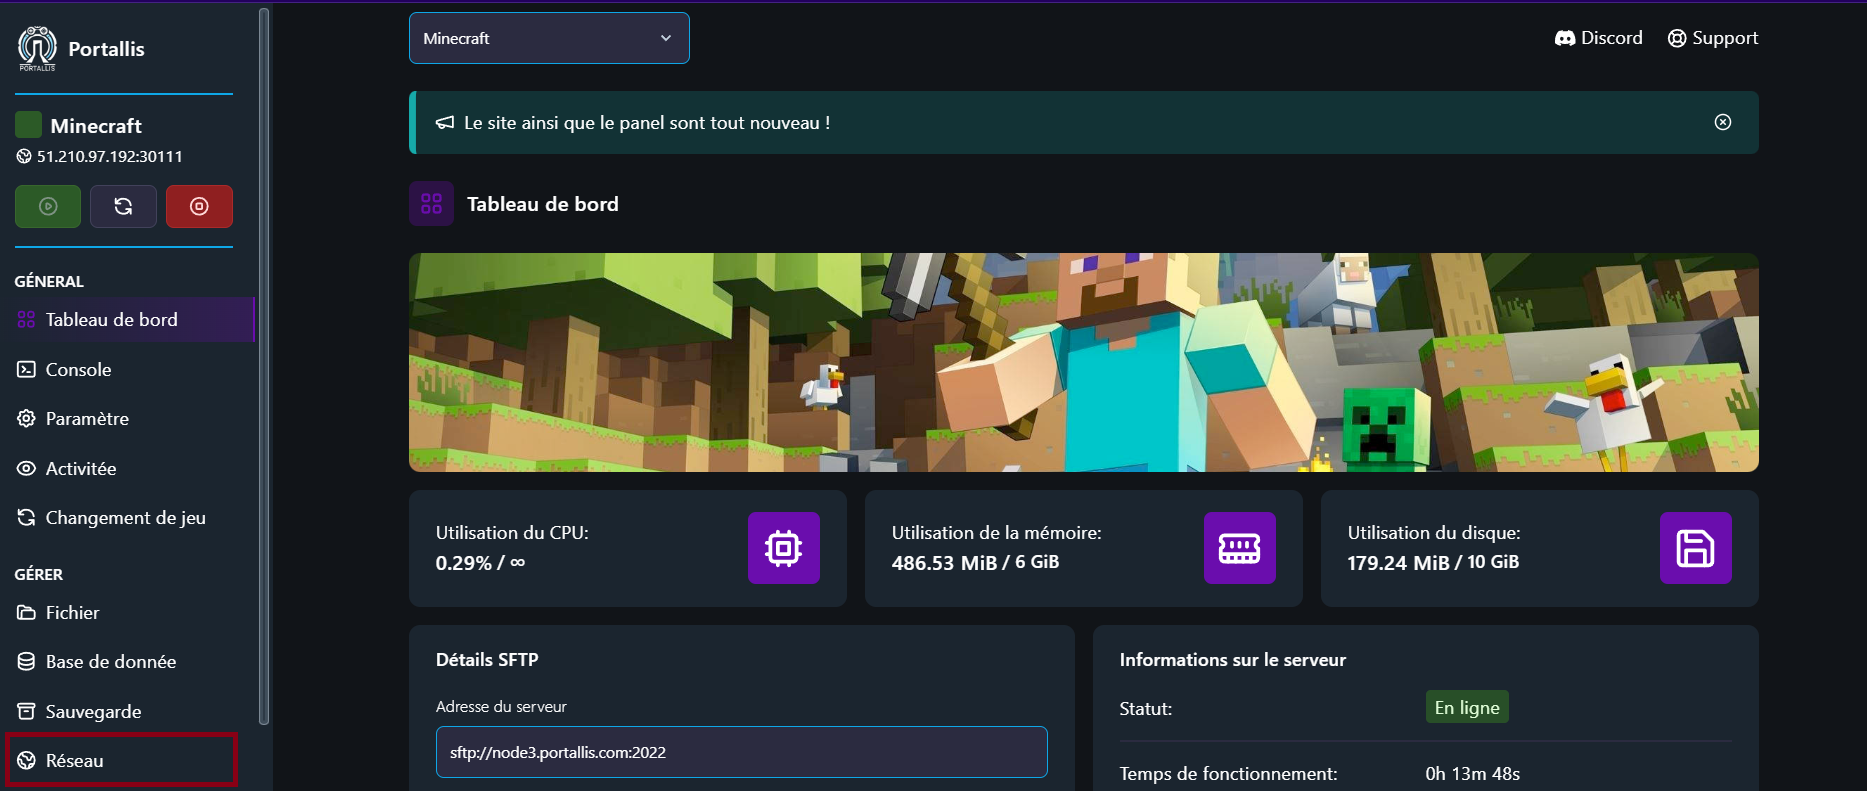
  • You will see three main buttons at the top left of the page:
    • Start: turns your server on.
    • Stop: shuts your server down cleanly.
    • Restart: shuts down and automatically relaunches your server.

3. Wait for the state change

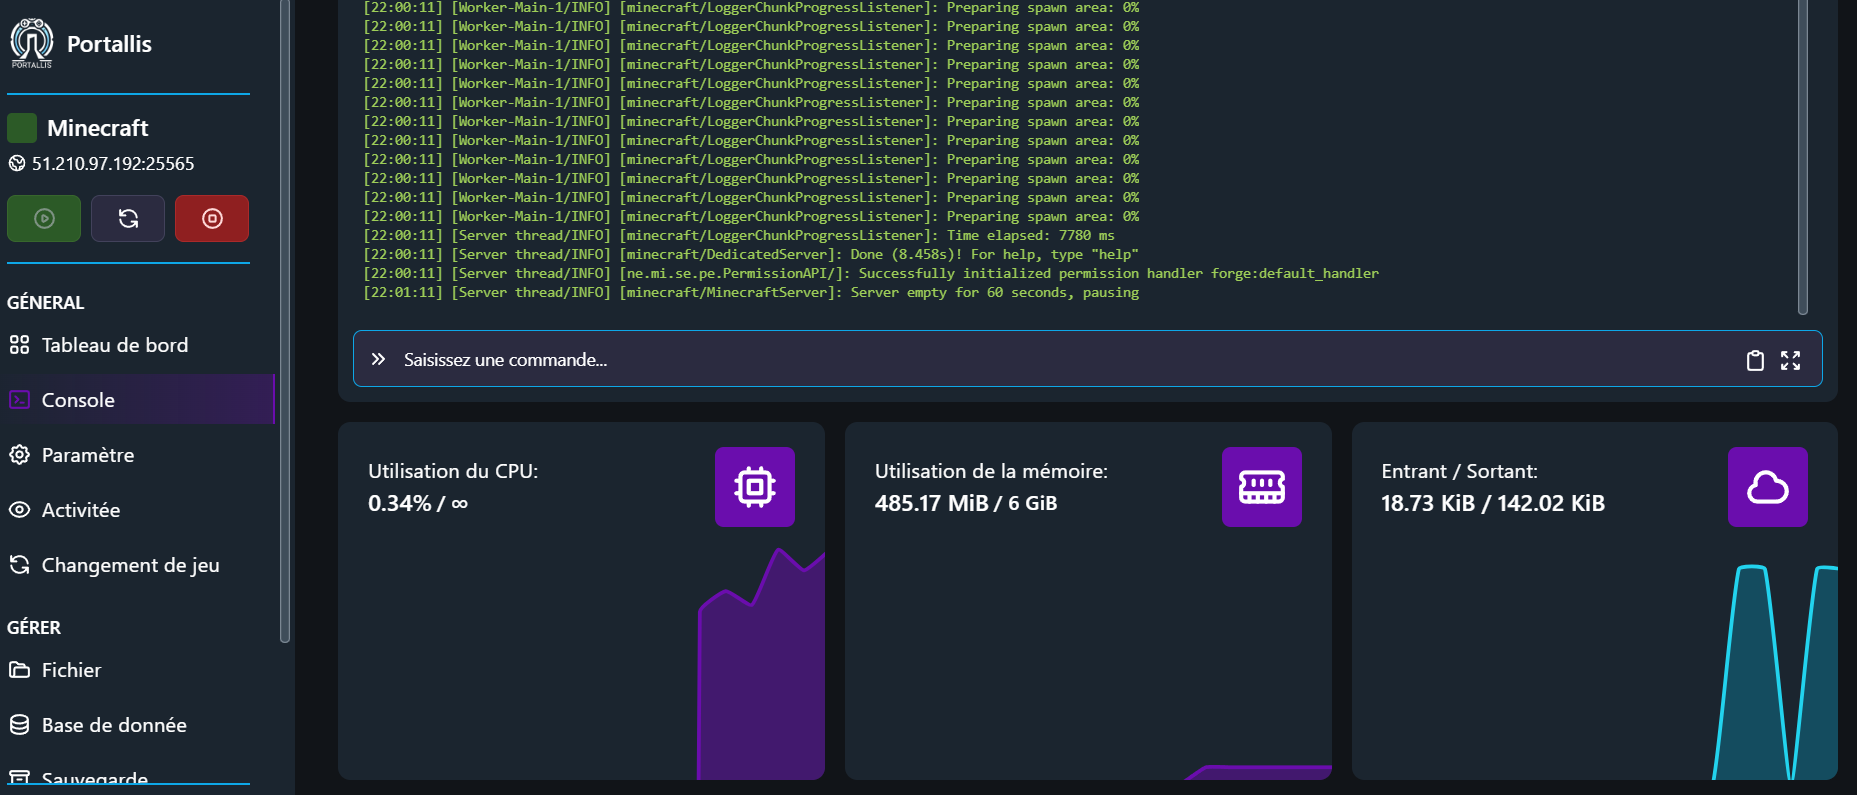
  • Once an action is launched, the server status is shown live (starting, online, offline, etc.) in the status area.
  • If the server does not start, check the console for any errors.

📌 Tip: To avoid unexpected outages, make sure your server has enough RAM to run properly.

1 1
2 1
3

1. Open the network information

  • Log in to your panel (panel.portallis.com).
  • Click the server concerned.
  • Go to the “Network” tab.

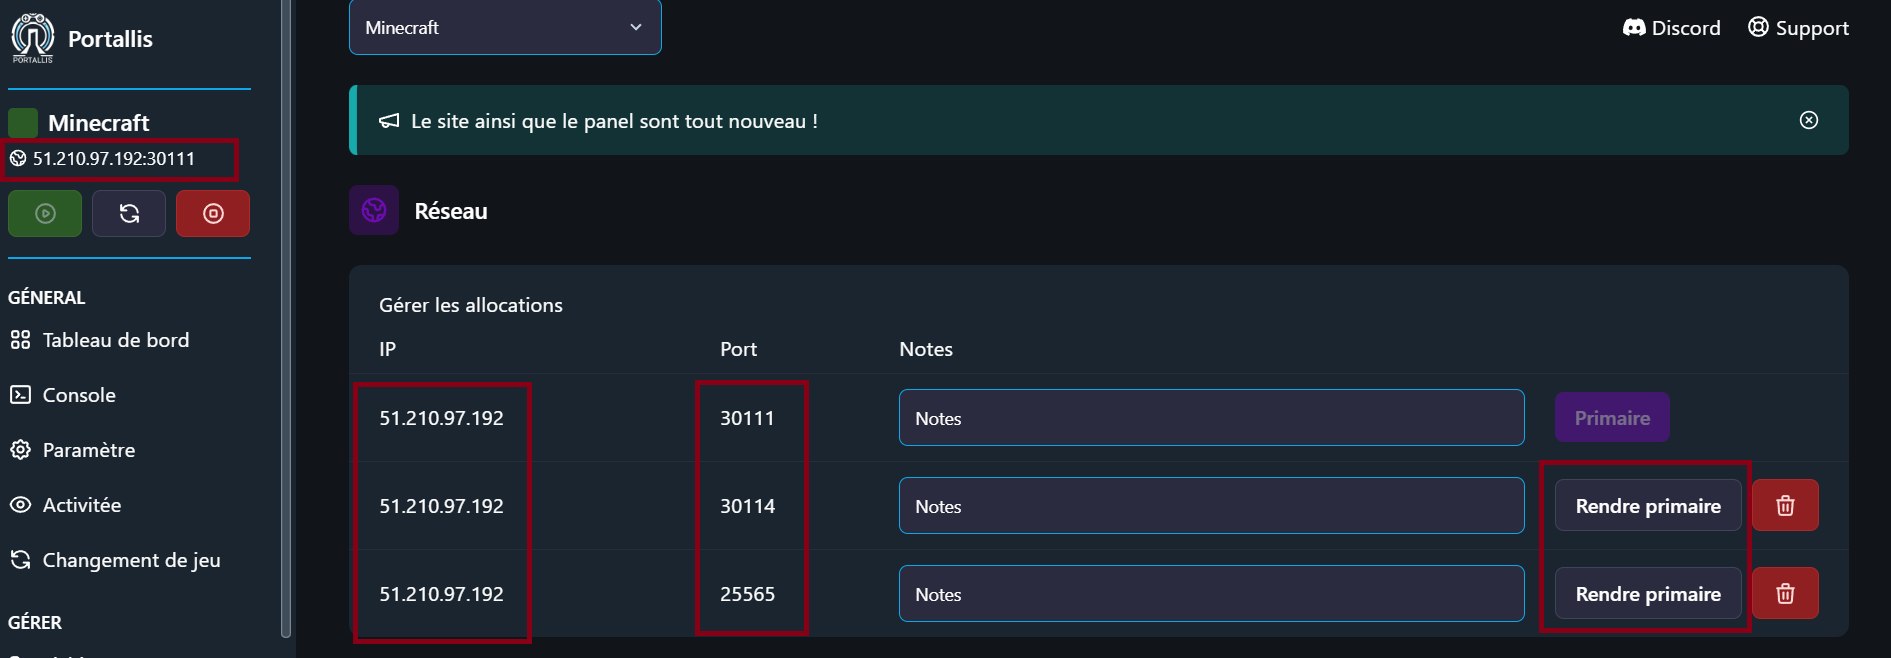
2. Find the IP and ports

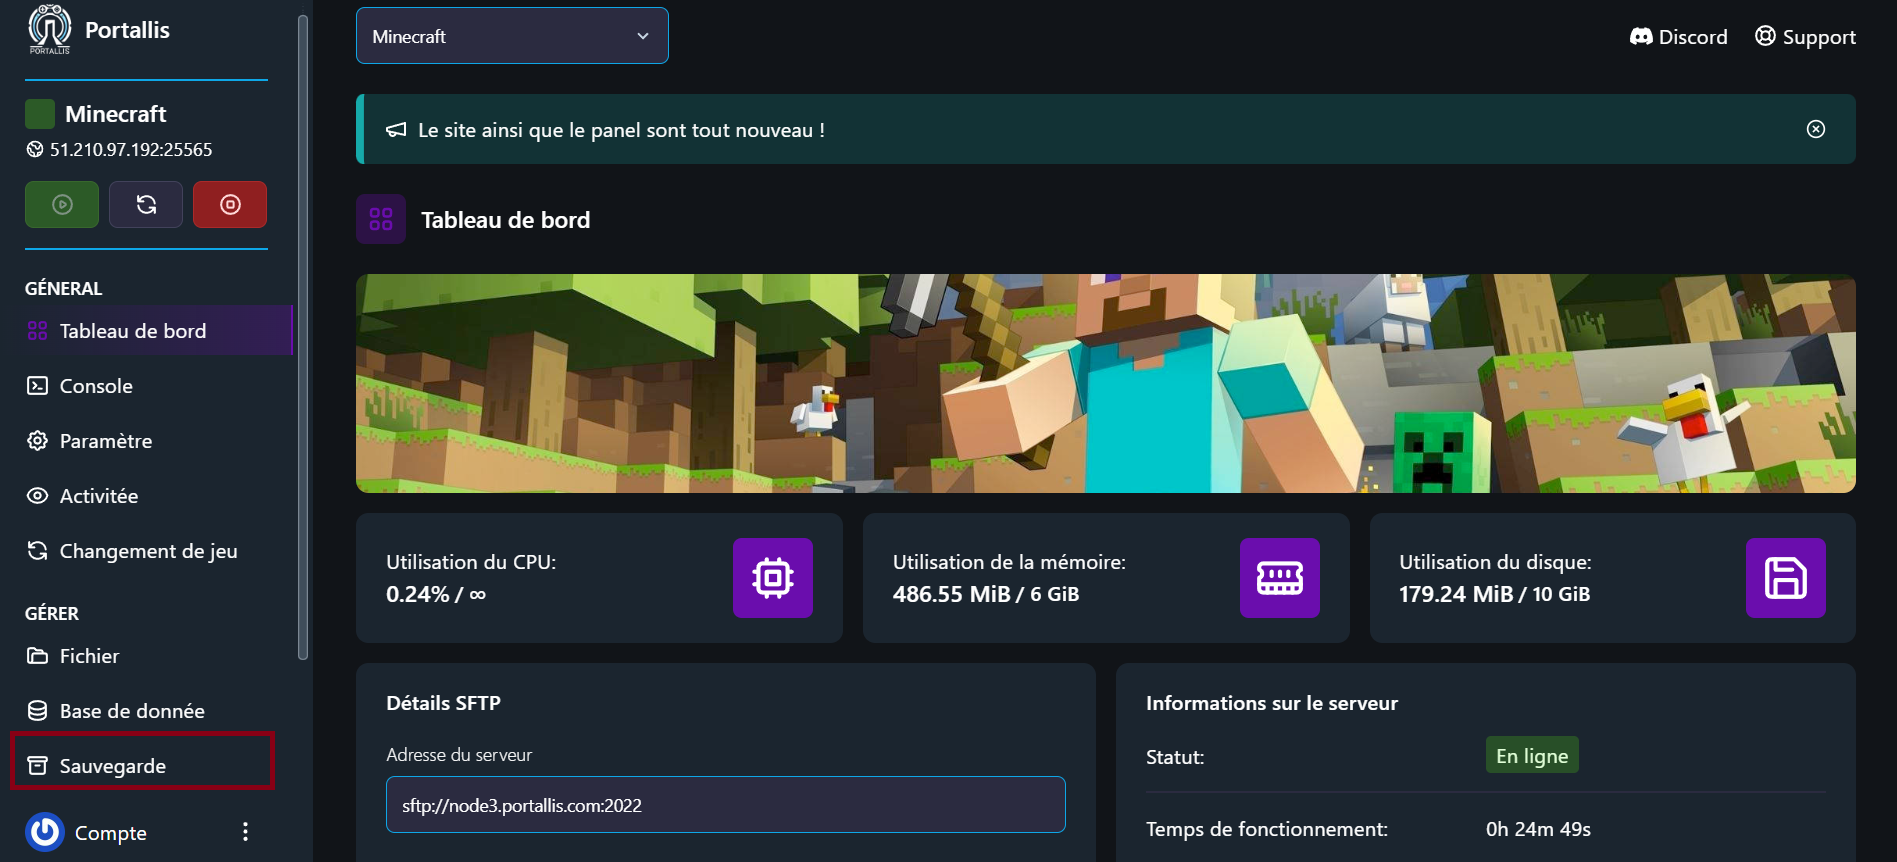
  • The server’s main IP address is shown at the top left.
  • The associated ports are listed below.
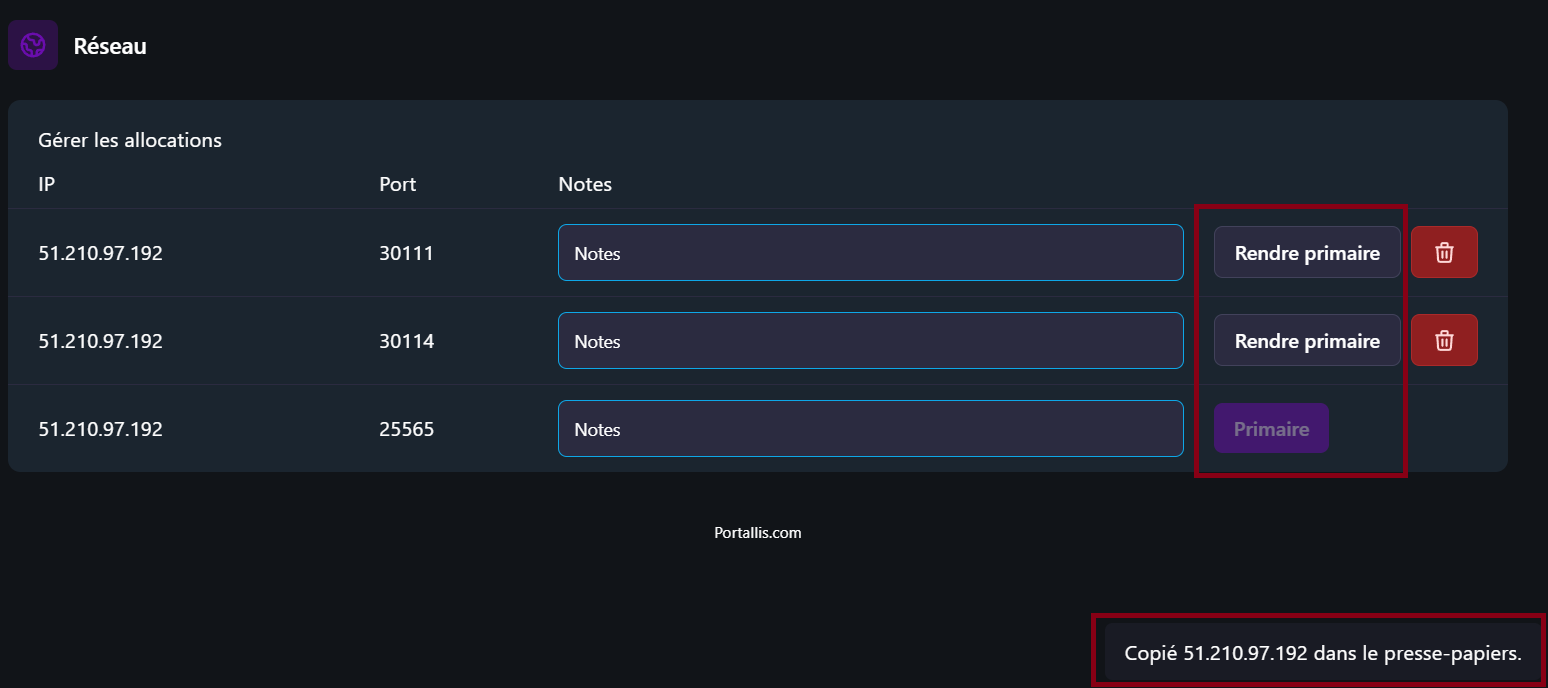
  • Click “Make primary” to turn a port into the primary port.
  • If you do not have the port you want, do not hesitate to contact support.

3. Copy the information and use it

  • Copy the IP address and the port. Clicking the IP copies the IP address directly.
  • Paste this information into the game’s connection settings or elsewhere.

📌 Tip: Some games require specific ports to be opened on your router to allow outside connections.

1 2
2 2
3 1

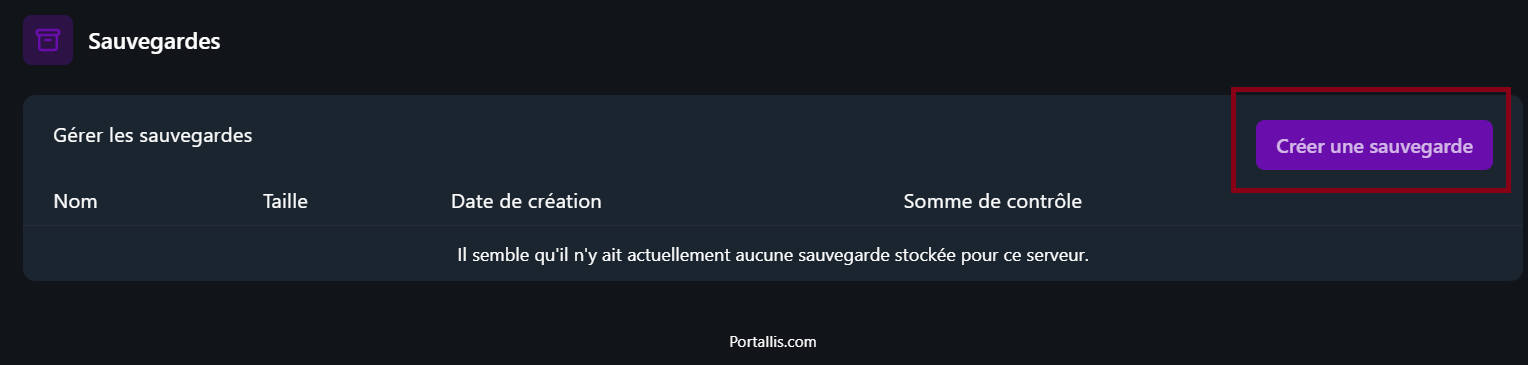
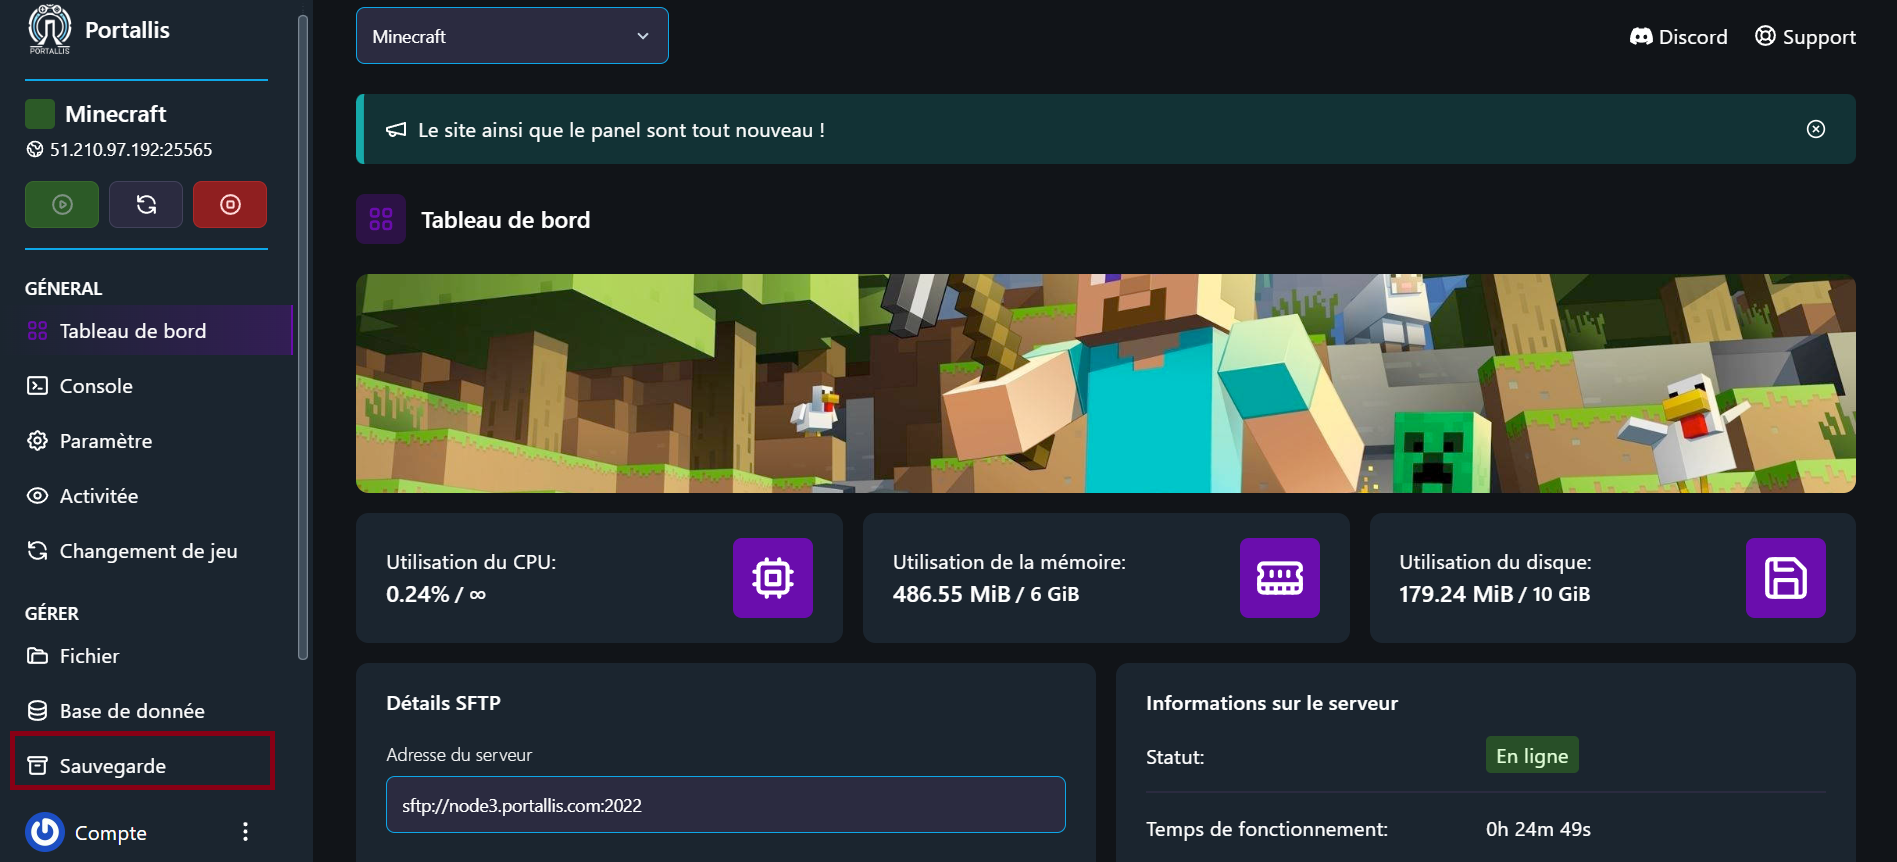
1. Create a backup

  • Open your server in the panel (panel.portallis.com).
  • Go to the “Backups” tab.
  • Click “Create backup”.

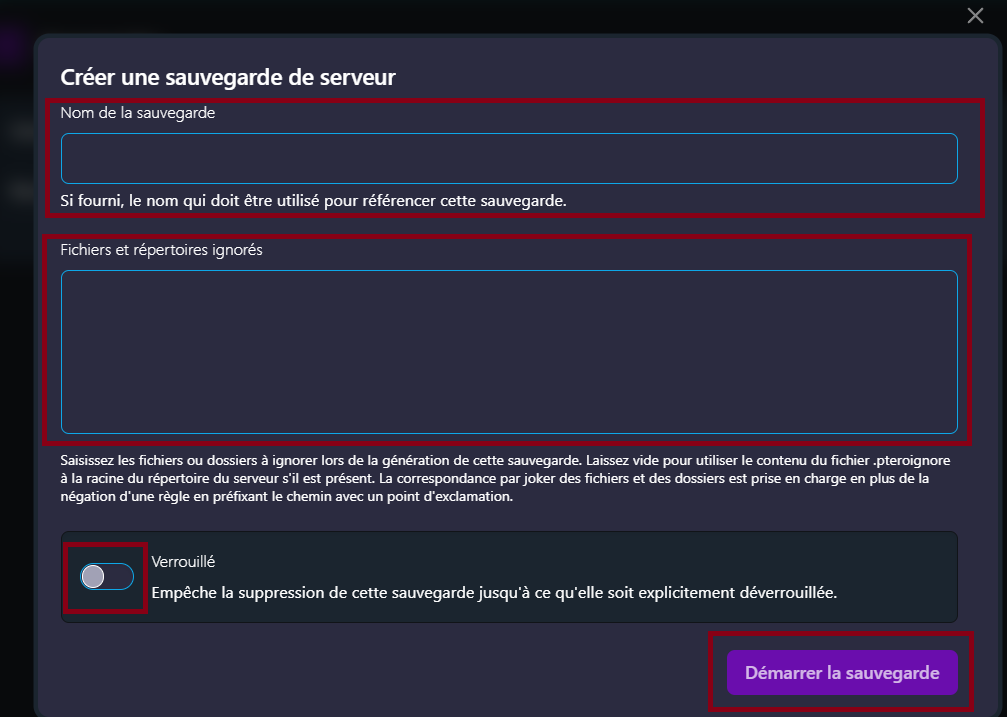
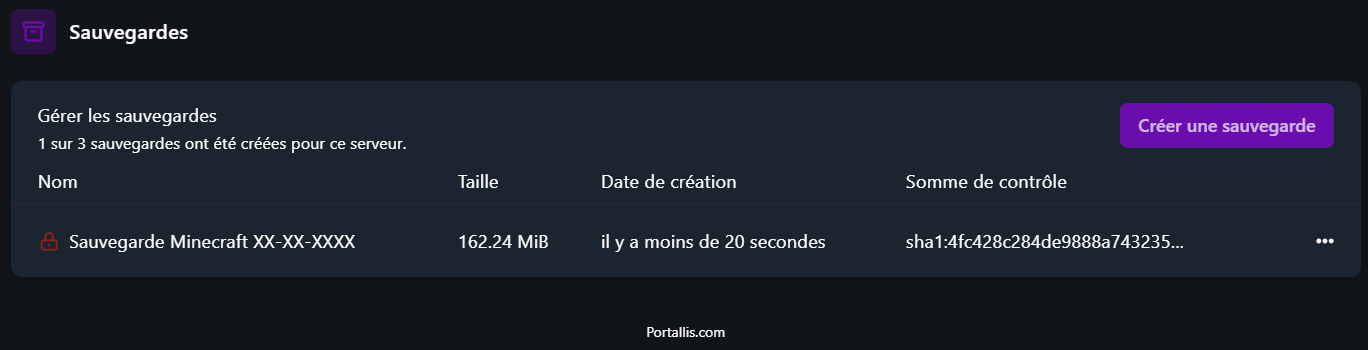
2. Start the backup

  • Enter a name for your backup.
  • Add the files and directories to ignore (such as logs).
  • Enable or disable locking (prevents this backup from being deleted until it is explicitly unlocked).
  • Click “Start backup”.

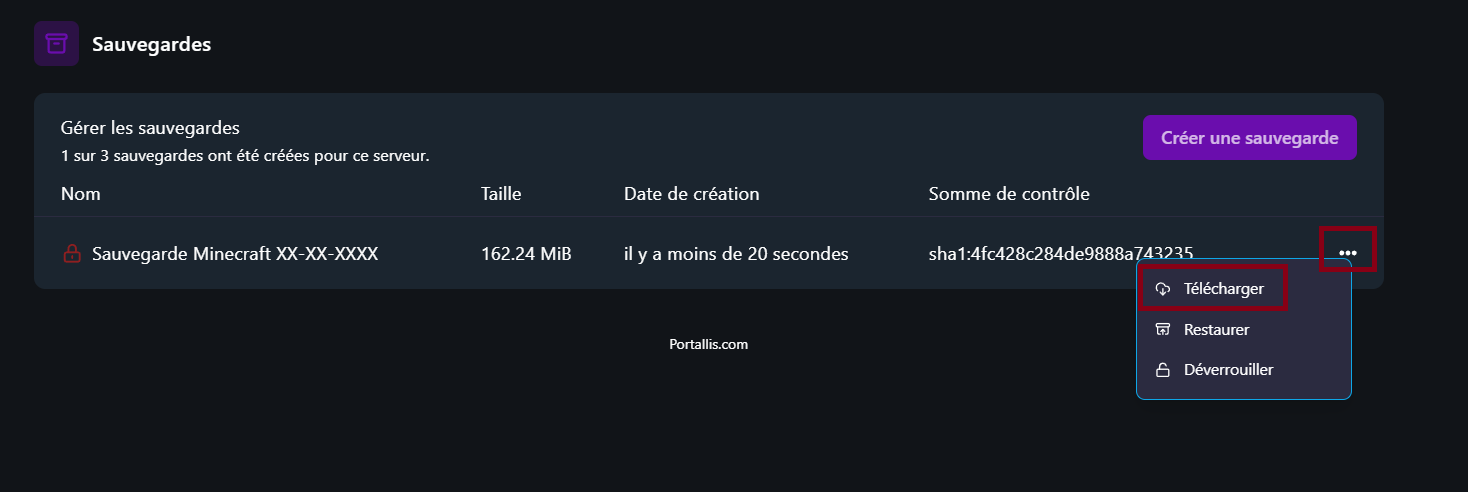
3. Download a backup

  • In the backup list, find the one you want to retrieve.
  • Click the “…” and select “Download” to save it to your PC.

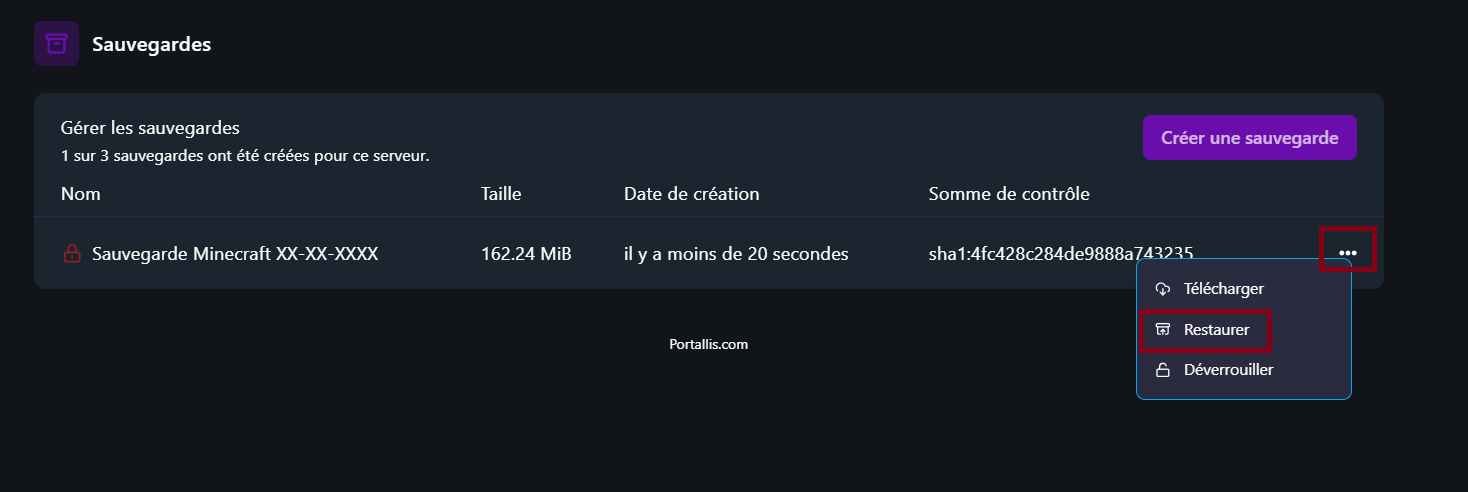
4. Restore a backup

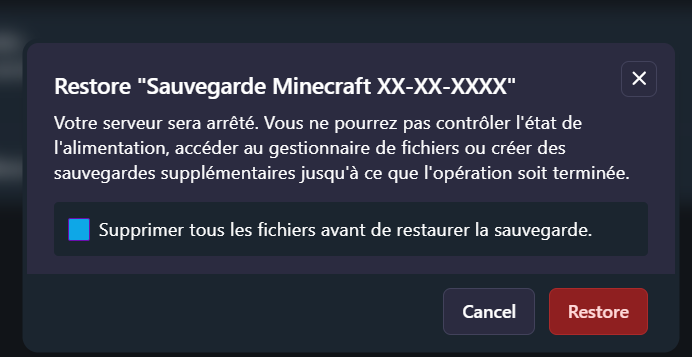
  • In the “Backups” tab, click “…” then “Restore” next to the chosen backup.
  • Choose whether or not to delete your whole server, or only replace the existing files with the backup.
  • Confirm the operation by clicking “Restore”.
  • Wait for the server to apply the backup and restart.

📌 Tip: Make regular backups before installing a mod or making major changes. Backups can be automated through the “Schedules” tab.

1 3
2 3
3 2
5
6
7
8

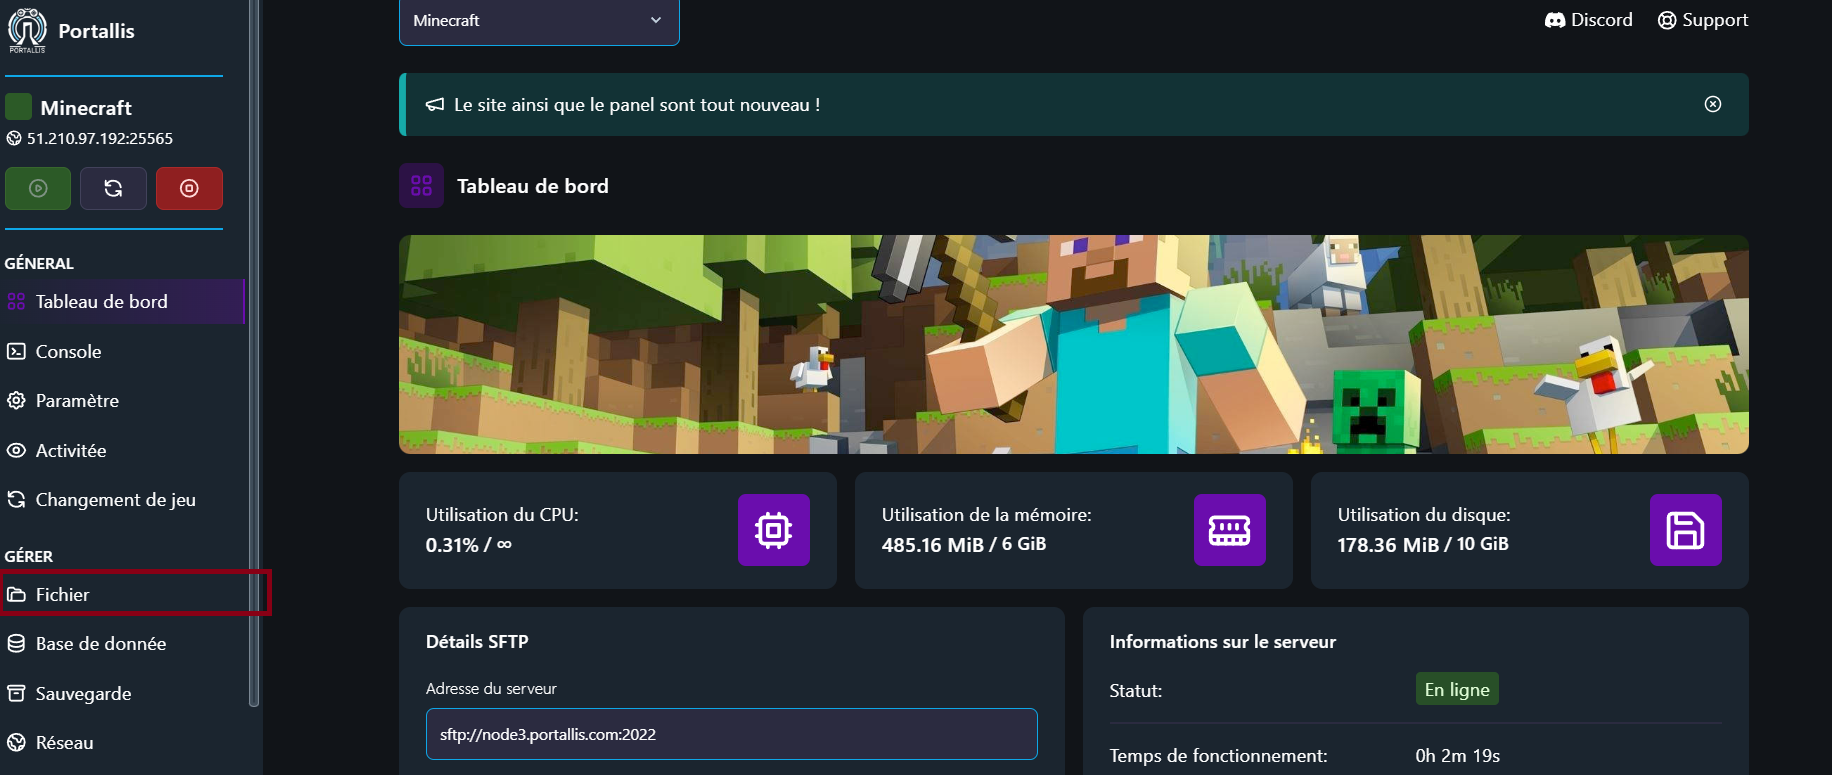
1. Open the server files

  • Log in to your panel (panel.portallis.com).
  • Click your server by clicking “Manage server”.
  • Go to the “Files” tab.

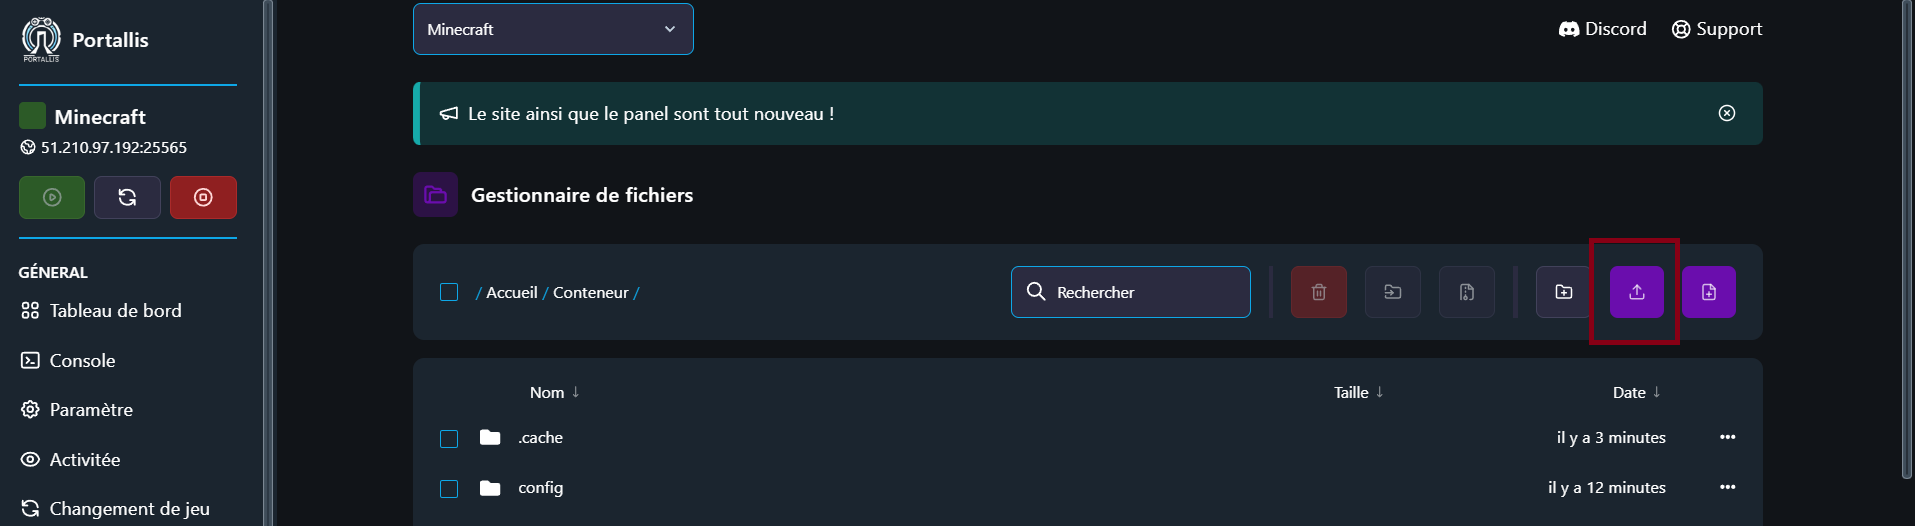
2. Upload files/mods/plugins

  • Download the folder, mod or plugin compatible with your game.
  • In the File manager, open the matching folder. For each game, you will find the right method in the game’s FAQ.
  • Click the Upload logo and add your .jar, .mod, .zip file or a folder.
1 1
2 4
3 3

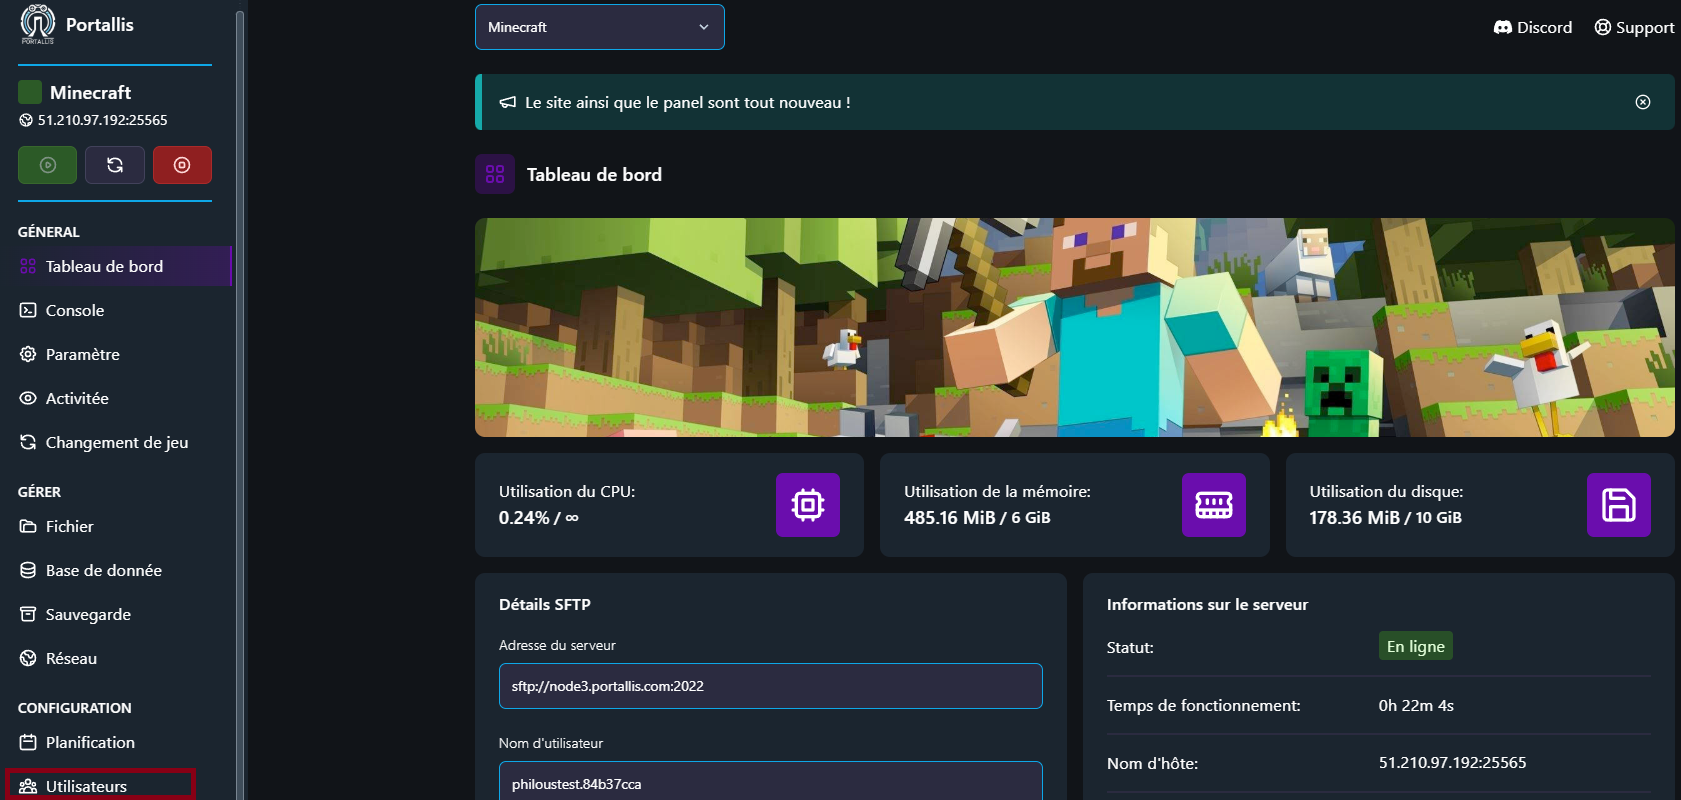
1. Open user management

  • Log in to the Portallis panel.
  • Select the server concerned.
  • Go to the “Users” tab.

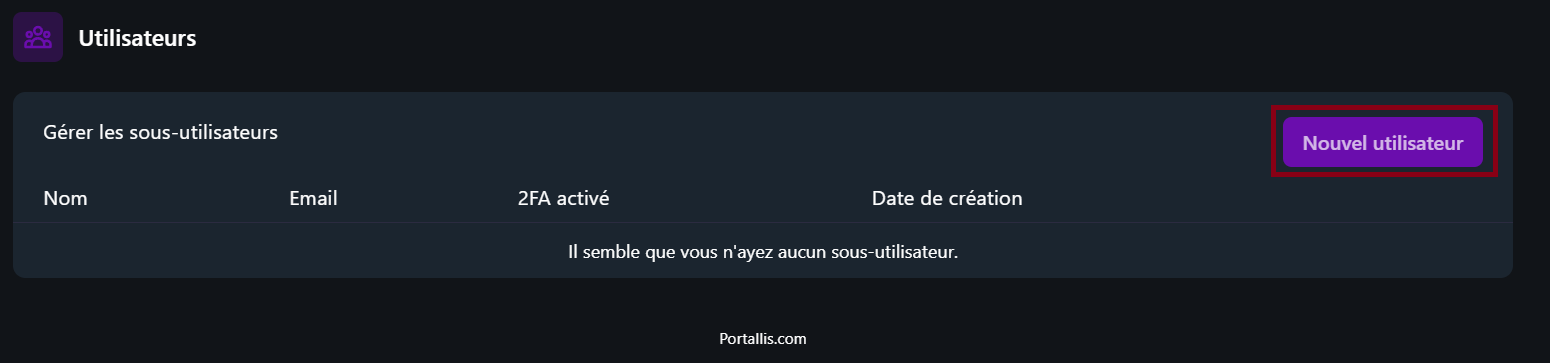
2. Add a new user

  • Click “New user”.
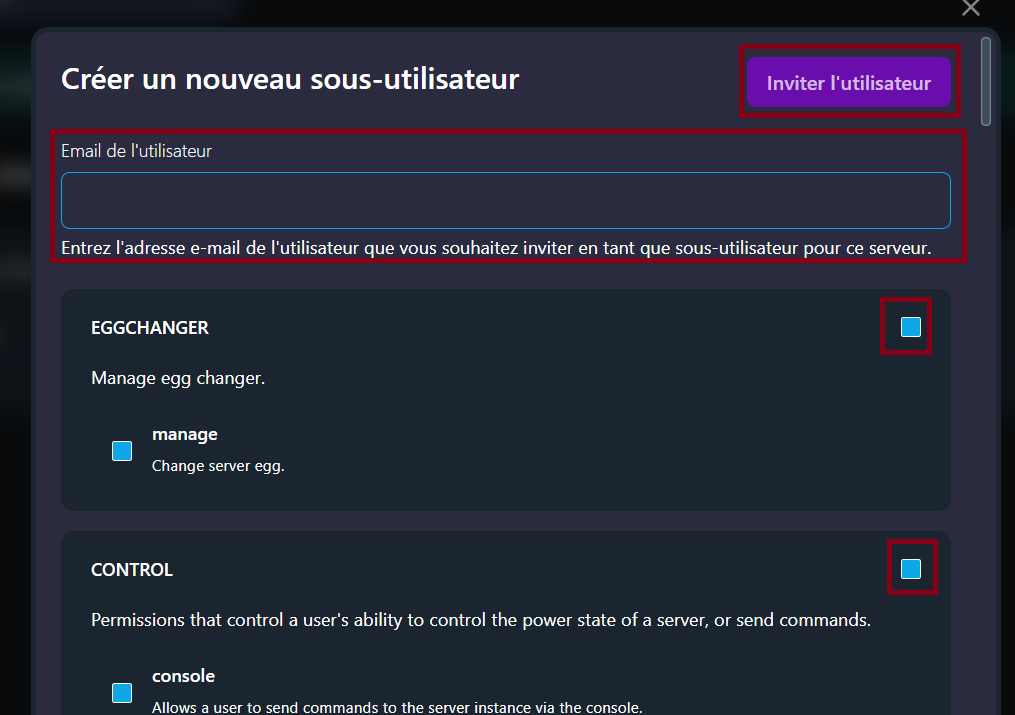
  • Enter the email address of the person to add.
  • Select the permissions they will have (for example: start/stop the server, access files, etc.).

3. Confirm and send the invitation

  • Confirm adding the user.
  • They will receive an invitation email and can log in with their own credentials.

📌 Tip: Only give access rights to people you trust, especially for managing files, users and backups.

1 4
2 5
3 4

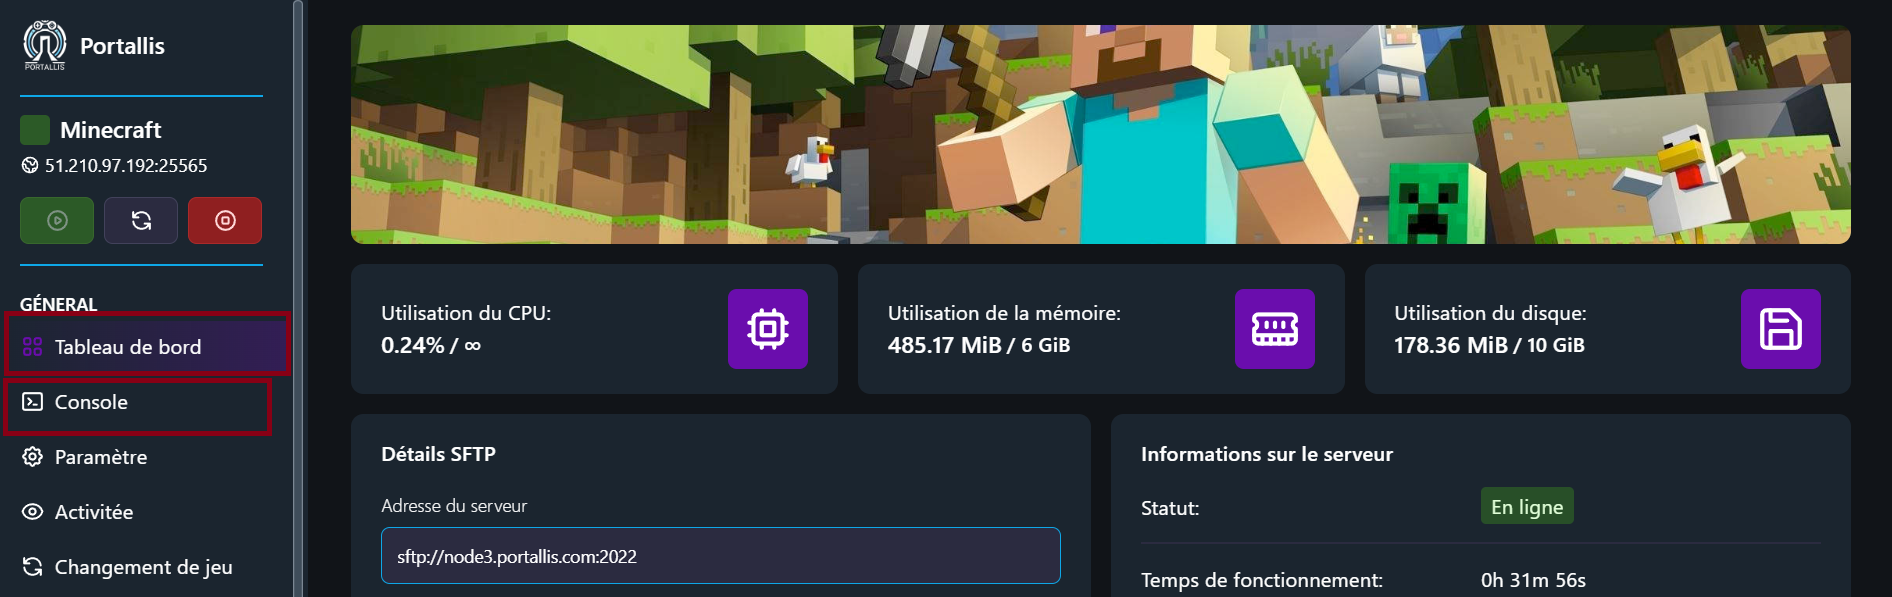
1. Open the server statistics

  • Log in to your panel (panel.portallis.com).
  • Select your server.
  • Look at the “Dashboard” or “Console” section.

2. Analyse the data shown

  • RAM used: a server that uses too much RAM can lag or crash.
  • CPU (%): a rate that is too high can point to a problem (a poorly optimised mod, too many players, etc.).
  • Storage: if your server is full, you will no longer be able to install mods or back up properly.

3. Optimise resource usage

  • Disable unused mods/plugins.
  • Reduce the number of player slots if needed.
  • Move to a plan with more RAM if your server is too limited. You can increase your RAM very easily from the client portal (portallis.com/client).

📌 Tip: If your server crashes often, look at the console for errors before contacting support.

1 5
2 6

1. Back up the old game’s files

  • Log in to the Portallis panel.
  • Go to the “Backups” tab.
  • Back up your current server.

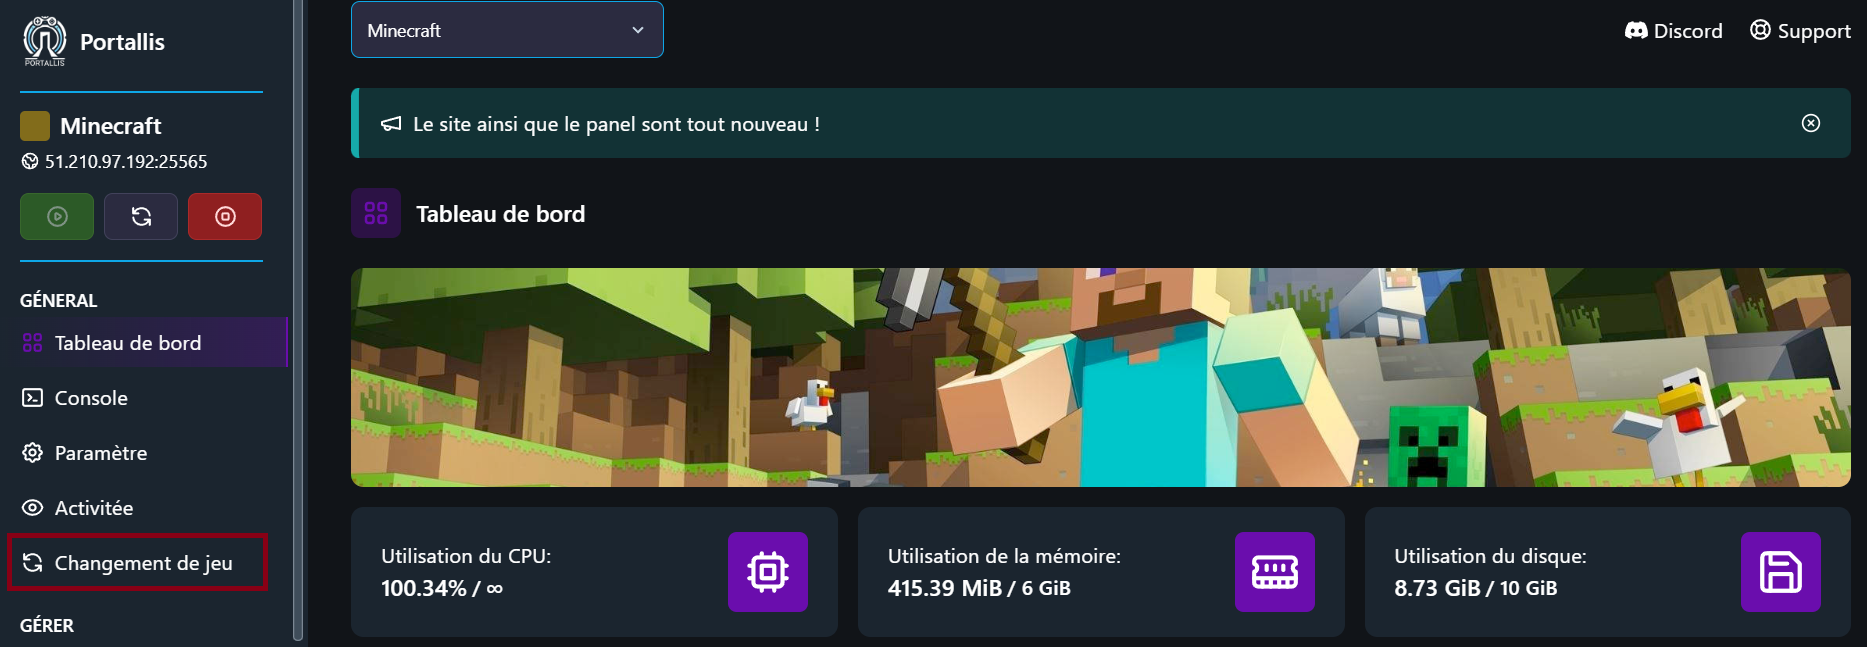
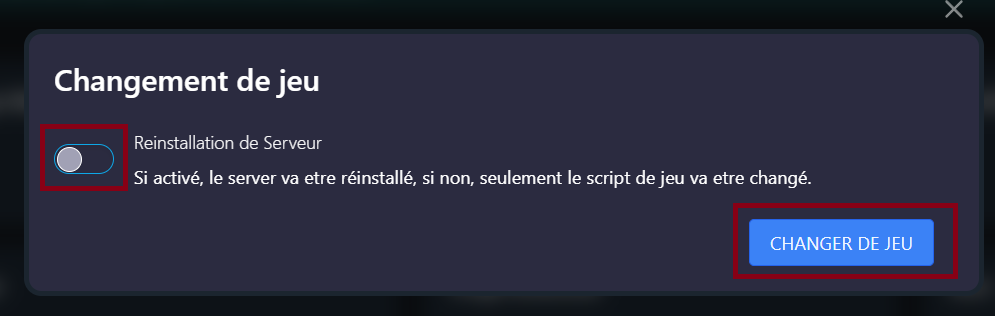
2. Change game

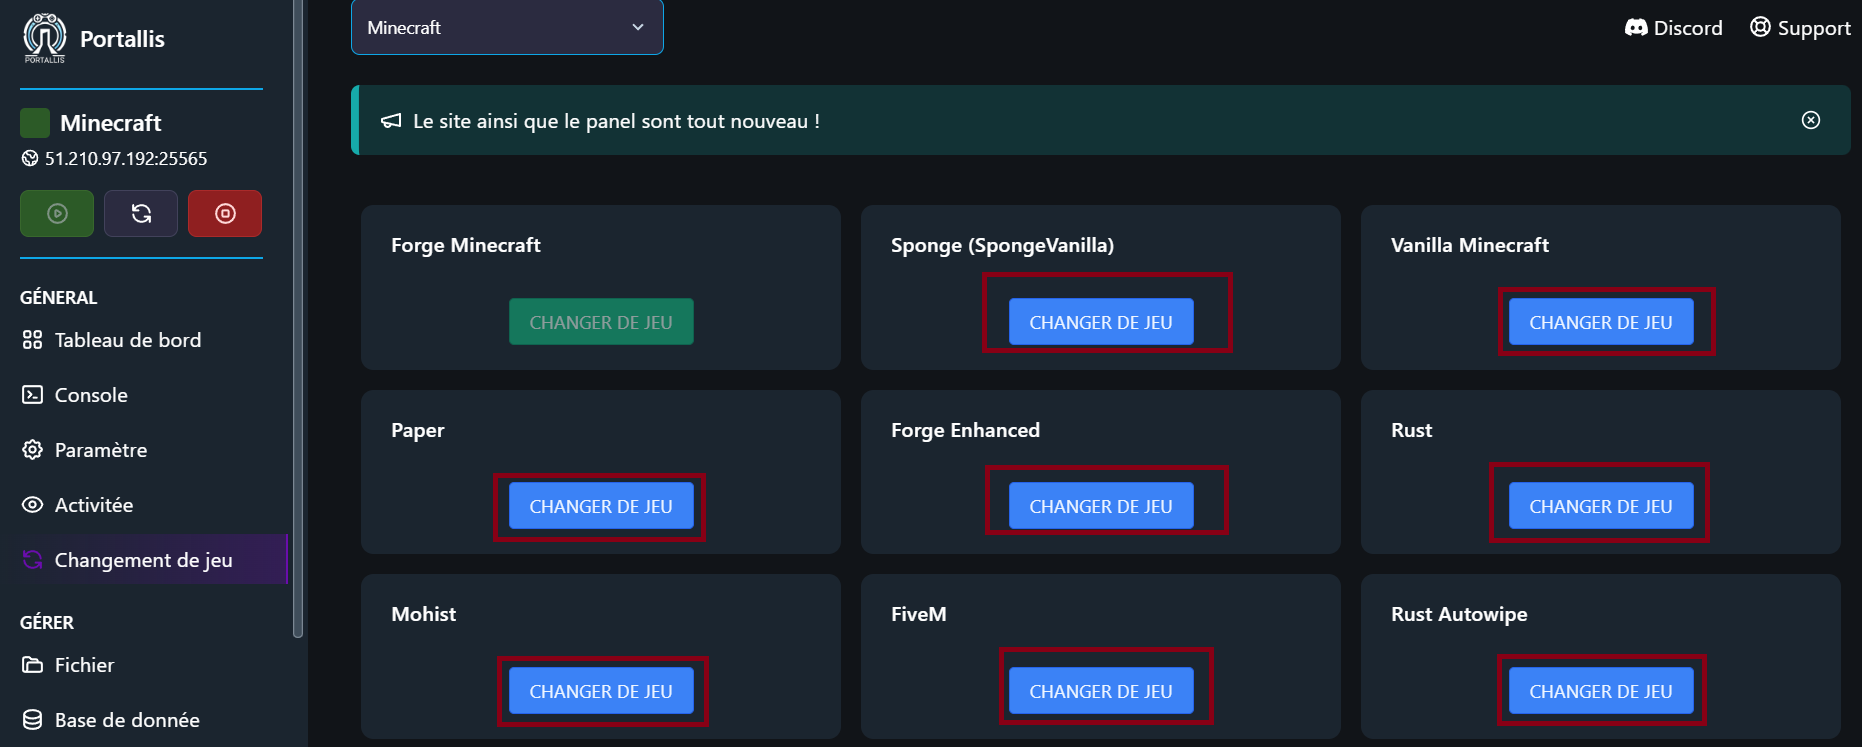
  • Go to the “Change game” tab.
  • Choose the game you want to install.
  • Click the “Change game” button.

3. Server configuration

  • You can choose to install the server 100%, or to install only the game script (for example to go back to a game you already had).
  • Click the “Change game” button.
  • The installation is under way and you will receive an email when it is finished.
1 6
2 7
3 5
4 2

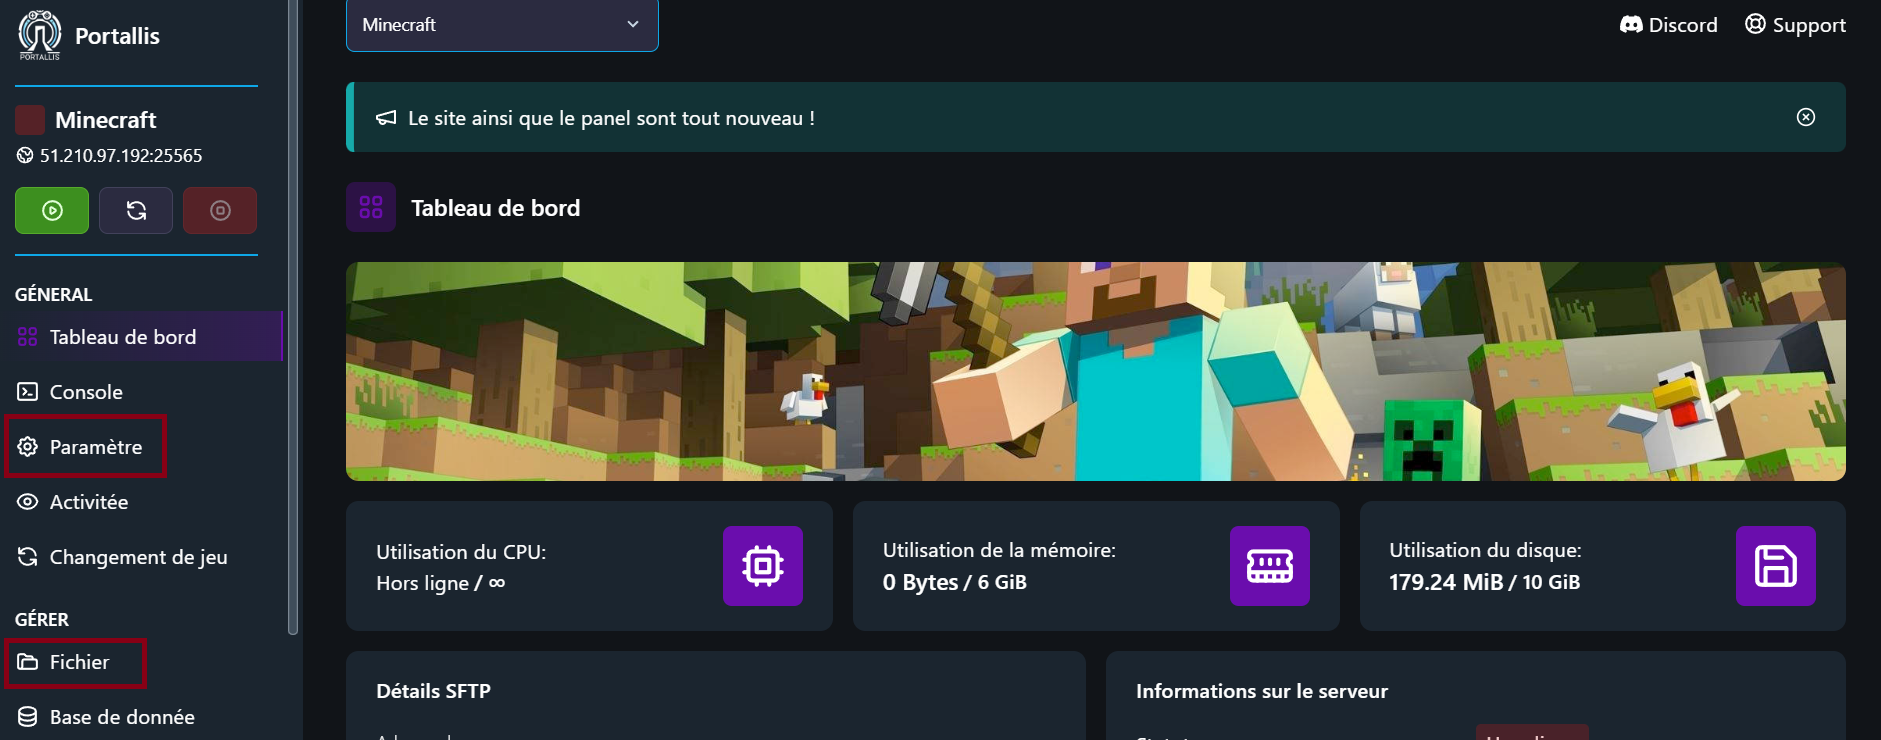
1. Back up your files (if needed)

  • Download your backups or important files through the “Files” or “Backups” tab.

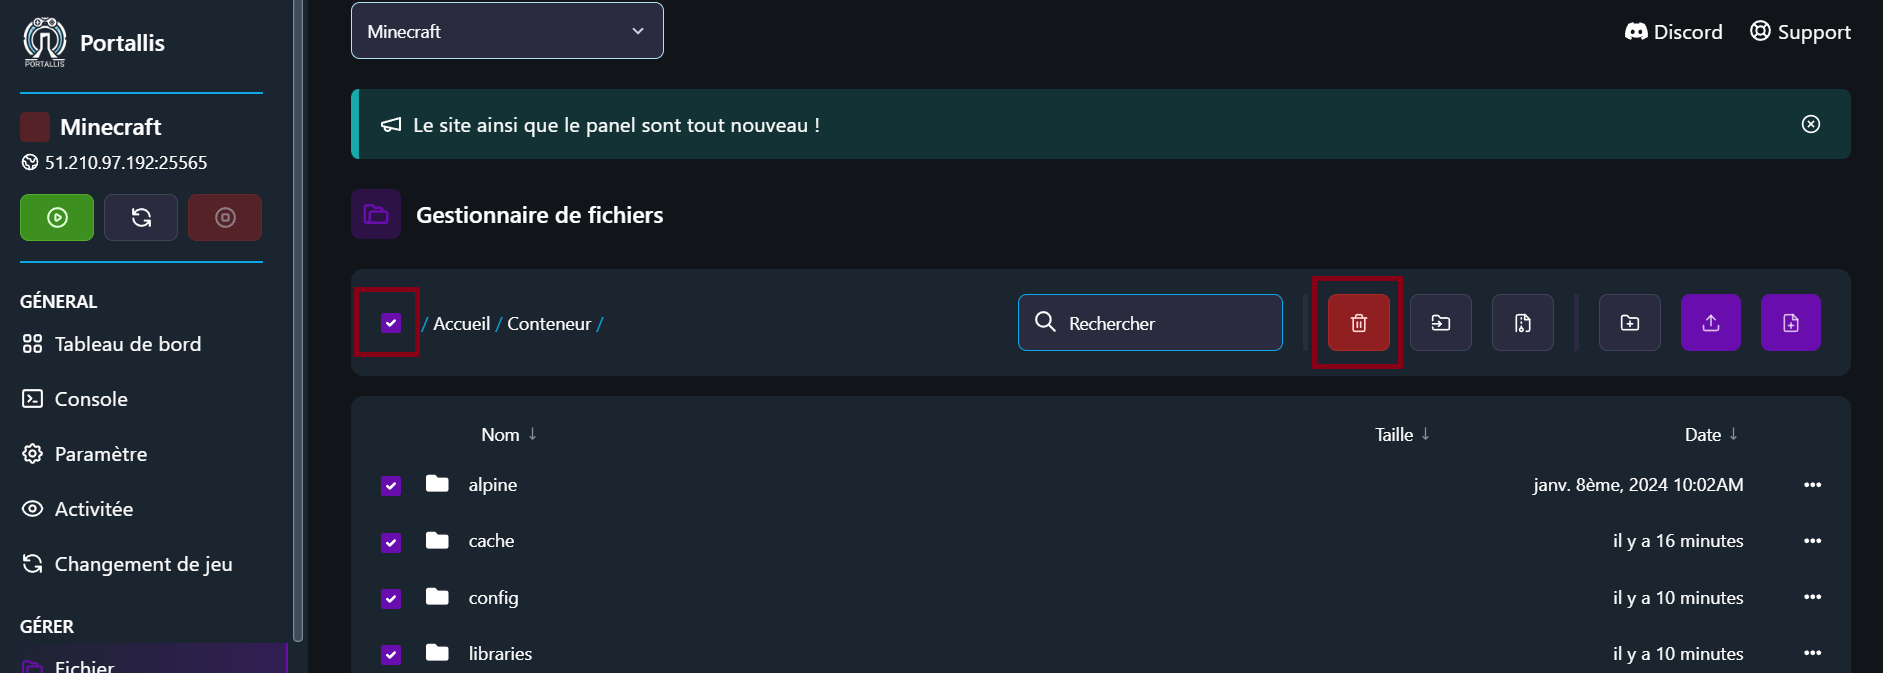
2. Delete the files (if needed)

  • If you want a completely fresh installation, you can delete ALL your files. This action is irreversible (except with a previously made backup).

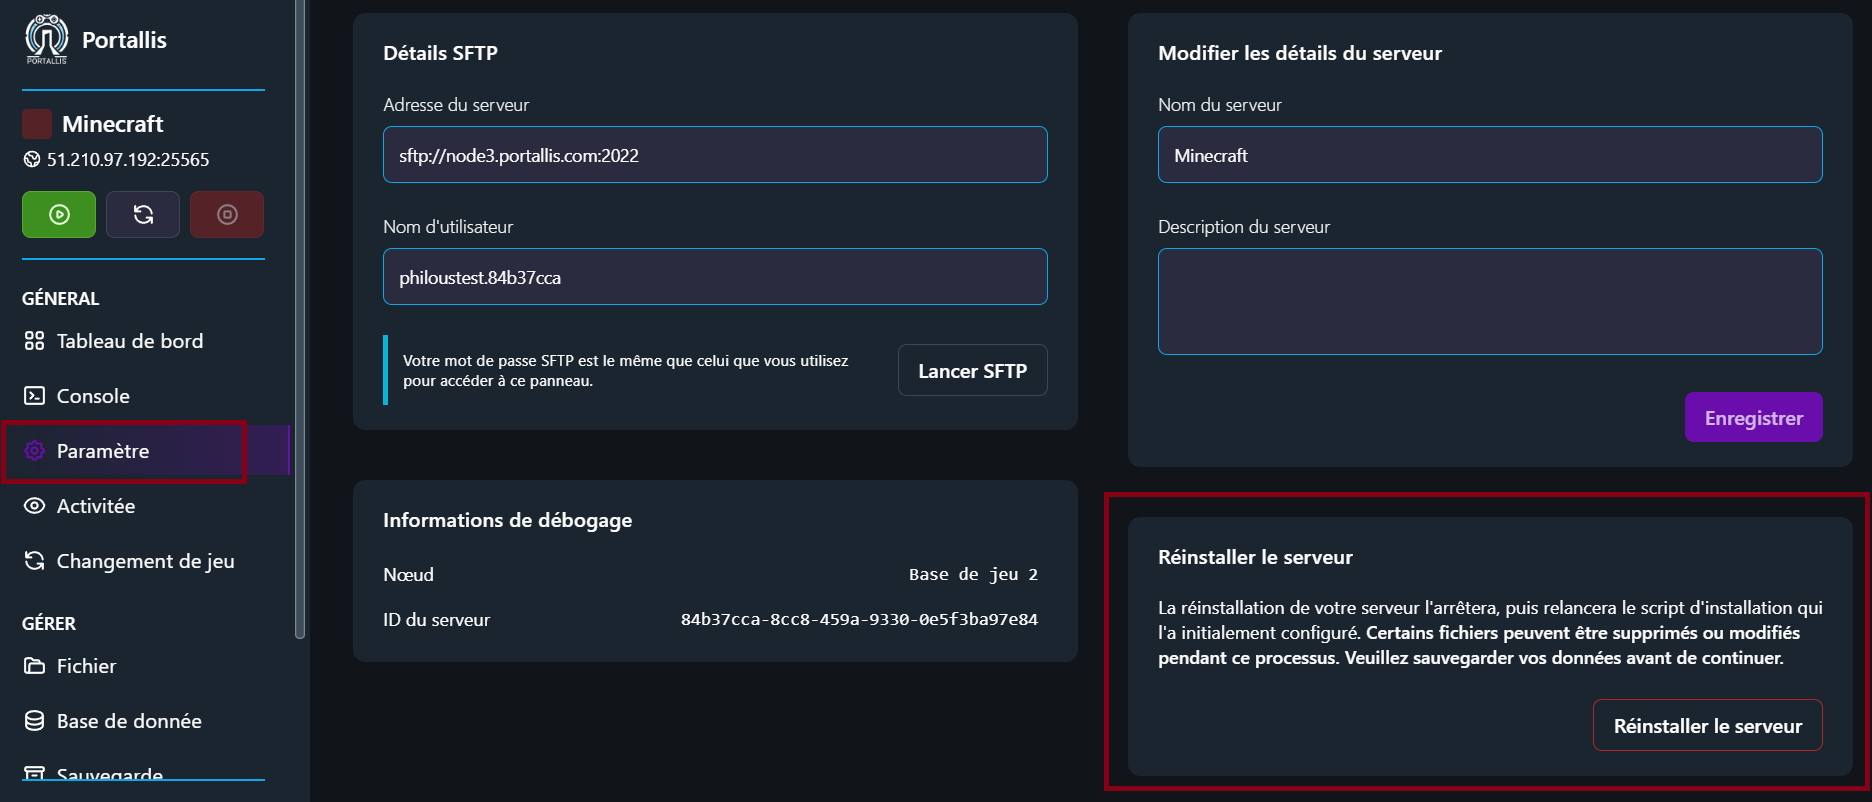
3. Start the reinstall

  • Go to the “Settings” tab.
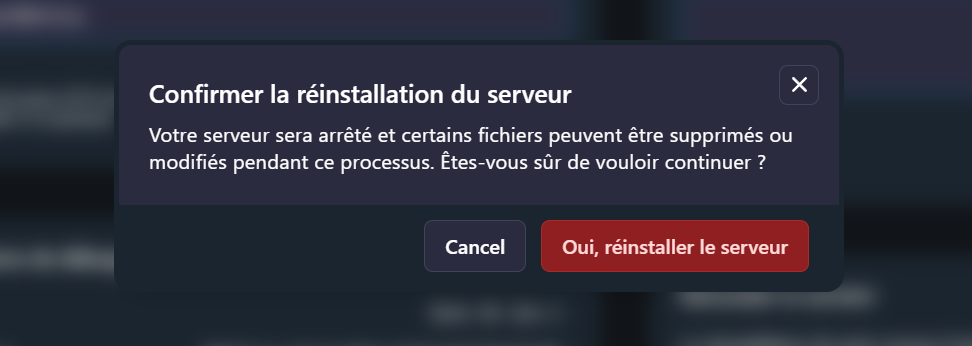
  • Scroll all the way down and click the “Reinstall server” button.
  • Confirm by clicking “Yes, reinstall server”.

4. Check after the reinstall

  • Once it is done, restart the server.
  • If needed, re-upload your previous backups.

📌 Tip: Only use this option if your server has too many errors and you want to start from scratch.

1 7
2 8
3 6
4 3

Got a question? Contact us!

If you still have questions or need quick help, our team is here for you.
👉 Join us on Discord to ask your questions live and chat with other users.
👉 Open a support ticket from your client area for personalised help.