Install a world (map) on your Minecraft server from the panel
you pick a map in the panel’s catalogue, install it on your server and, if you want, set it as the active world.
Before you start
- A world (or map) is a ready-built playground: OneBlock survival, a roleplay city, a castle, an island… The panel’s catalogue offers thousands (6,588 when we looked).
- Your server already has a world called world (“Local world”). Installing a map adds a world; the server only uses it if you set it as the active world (see step 3).
- Check the game version shown on the map’s page (for example “26.3”) and compare it with your server’s on the Versions screen.
- Make a backup before switching worlds, if your plan includes backups.
Open “Worlds”
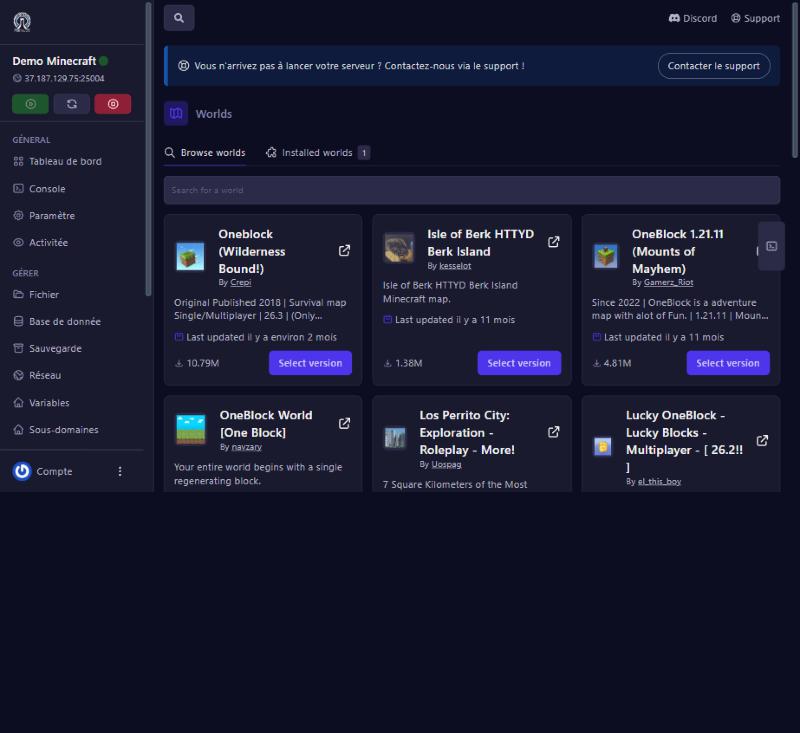
Worlds menu (Minecraft section). Two tabs: Browse worlds (the catalogue) and Installed worlds (the server’s worlds). Each card shows the name, author, a summary, the last update date and the download count. The catalogue is paged (20 cards per page): use Search for a world to find a map by name.
Choose the map version
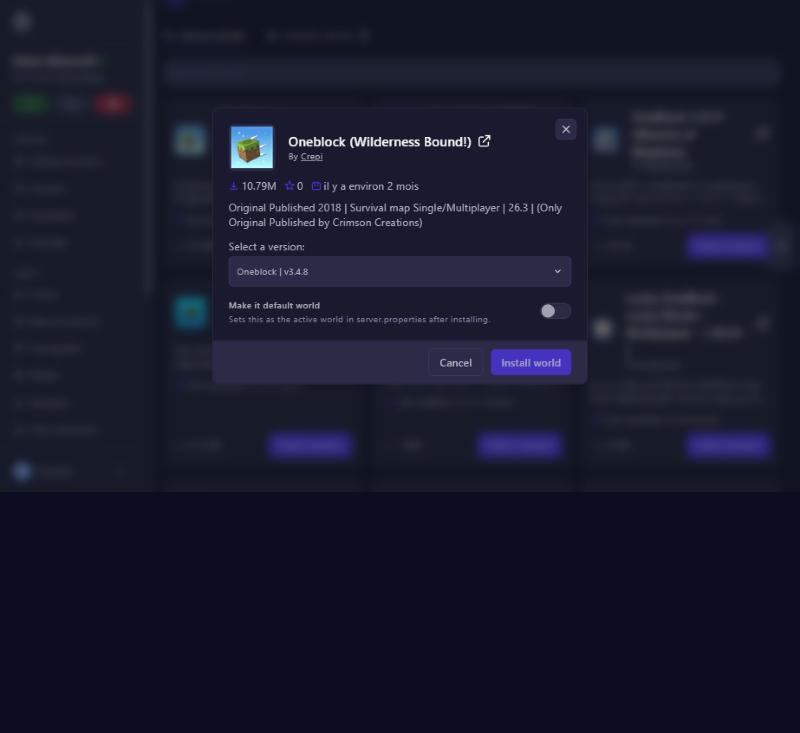
Click Select version. The window shows the map’s name, author, statistics and description, then the Select a version list (for example “Oneblock | v3.4.8”). Read the name of the line you pick: the first one is not always the right one. On “One Chunk”, for example, the first line was “1.3 Cheats” (the cheats variant) and the next “1.3” (the normal version). Take the latest one that matches what you want, and check the game version in the description.
Set it as the active world (or not)
Under the list, the Make it default world switch says: Sets this as the active world in server.properties after installing. In practice:
- on: the panel replaces the Level Name setting (the active world) in
server.propertieswith the map’s folder name, immediately; the server loads it at next start. We checked: after installing “FPS Winter Stress Test” with the switch on, the linelevel-name=FPS Winter Stress Testappeared in the file; - off (default): the map is added in a separate folder, and
level-nameis unchanged (ours stayedworld): your current world keeps being used.
Good news: the install works while the server is running, in a few seconds for a small map. The map’s folder carries the chosen version’s name (for example “One Chunk 1.3”, spaces included). To switch world later, just edit Level Name on the Properties screen with that folder’s exact name, then restart.
Click Install world to start the installation.
Restart and check
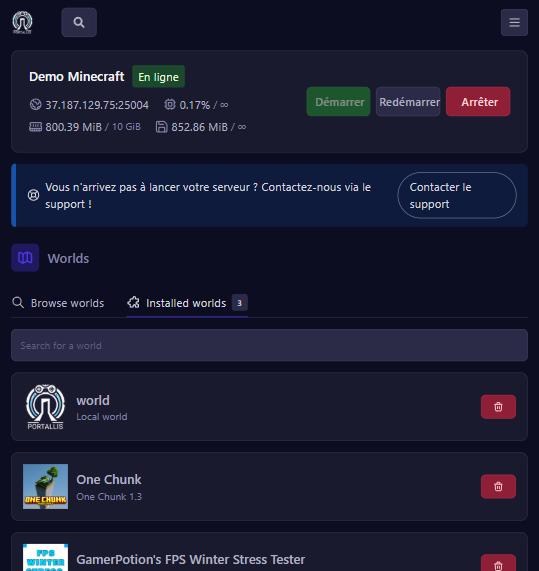
Restart the server. Open the Installed worlds tab: the map shows next to world (“Local world”), with the map’s name and its folder name. In the Console, at startup, Minecraft prints the world it loaded. Join to check.
Delete a world
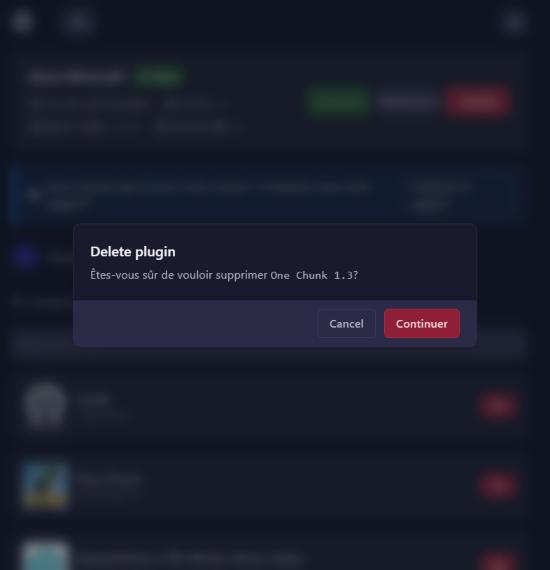
In Installed worlds, each world has a red trash button. A click opens a confirmation window (“Are you sure you want to delete…?”, whose title reads “Delete plugin”: it is the world that gets deleted); Continuer (Continue) deletes the folder from the server, Cancel backs out. We tested it on an installed world: its folder disappeared. Only use this button when you are sure, and never on the active world (the one in level-name). A backup first avoids regrets.
If it does not work
The server still loads the old world
the “Make it default world” switch was off. Change the active world’s name (Level Name) on the Properties screen, writing exactly the folder’s name (spaces included), then restart.
The world is empty or errors out
the map’s game version does not match the server’s. Pick another map version or change version in Versions.
A new empty world was created
the active world’s name matches no folder. Put the right name back in Properties.
I want to go back
restore your backup (see the “Backups” guide).
Questions? Get in touch
Our team will answer by message or on Discord.